Android Google Maps Tutorial
Android Google Maps Tutorial. Google Maps has numerous features in it, it can be used on iOS, Android, Windows mobile and on Desktop PCs too. It is the best Maps application available in today’s smartphones world.
So how to use it your application or how to integrate Google maps in our code? In this post I’ll be sharing code to integrate and using Google maps api in your Android application.
We’ll start by creating a new project in Android Studio. No need to worry about integrating the play services lib as Android studio will be adding it itself, once you make the project.
Creating the Google Maps Project in Android Studio :
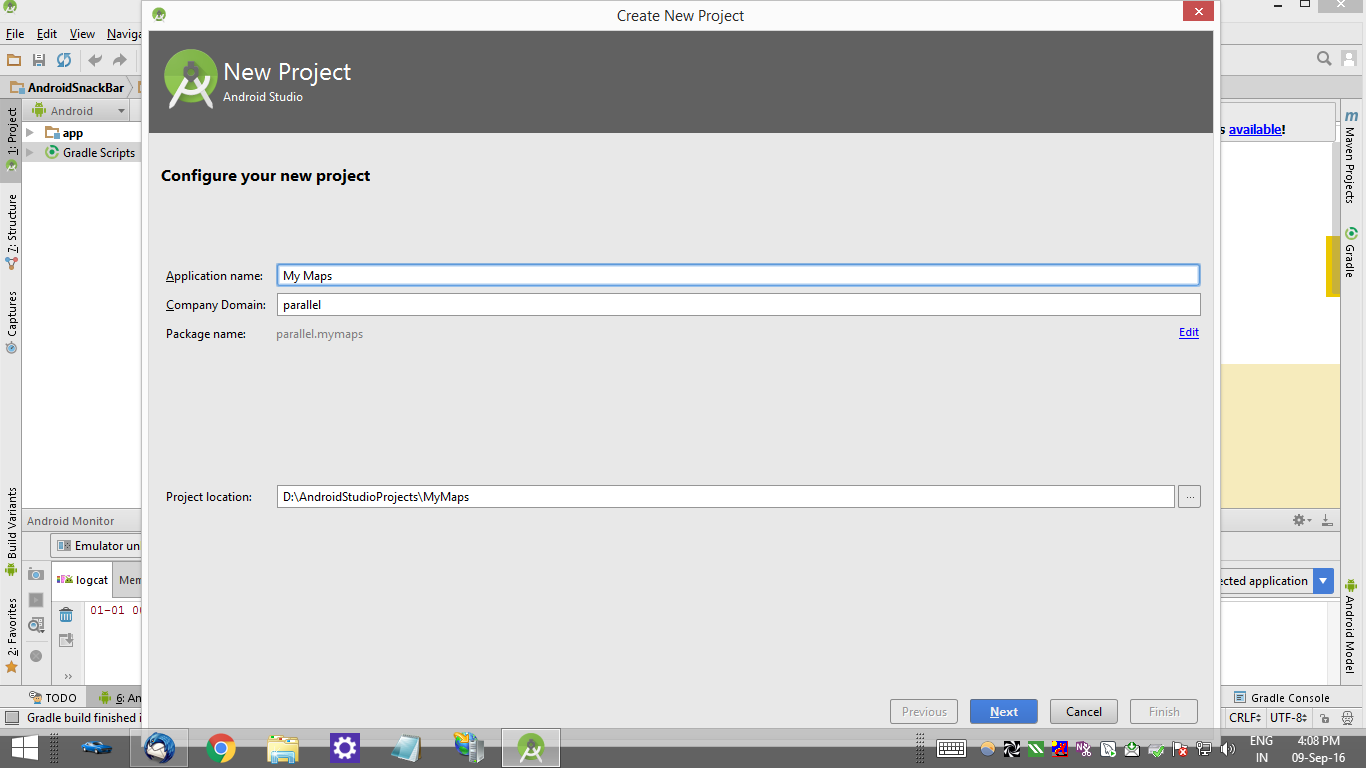
1. Open Android Studio and create a new project with name My Maps , company domain can be anything, just put your name in there and click NEXT .
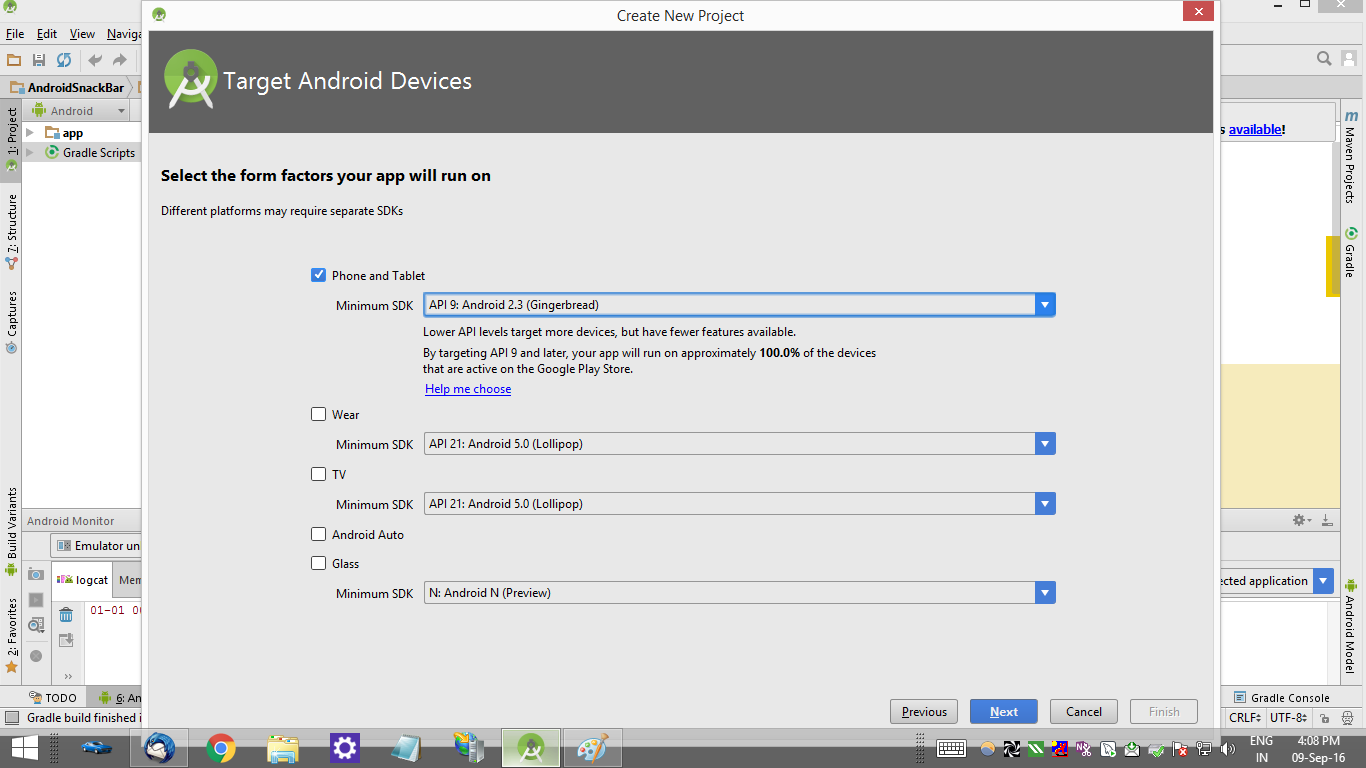
2. Select Phone and tablet and select your preferred Minimum SDK version, I’m selecting as Android 2.3 version and click Next.
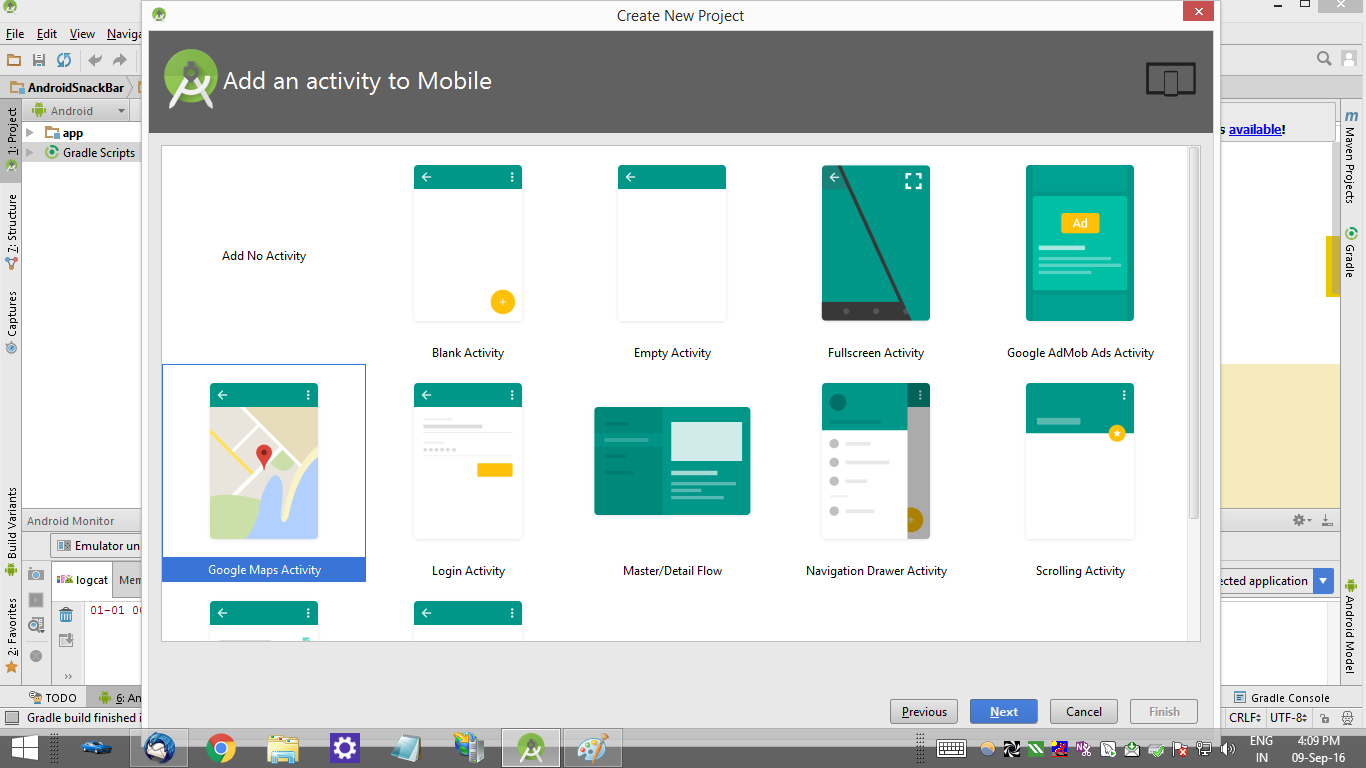
3. In the next screen, select Google Maps Activity. This is very important, if you do not select this, Google maps and Play services lib will not be added to your project and you will have to add it manually.
Click Next.
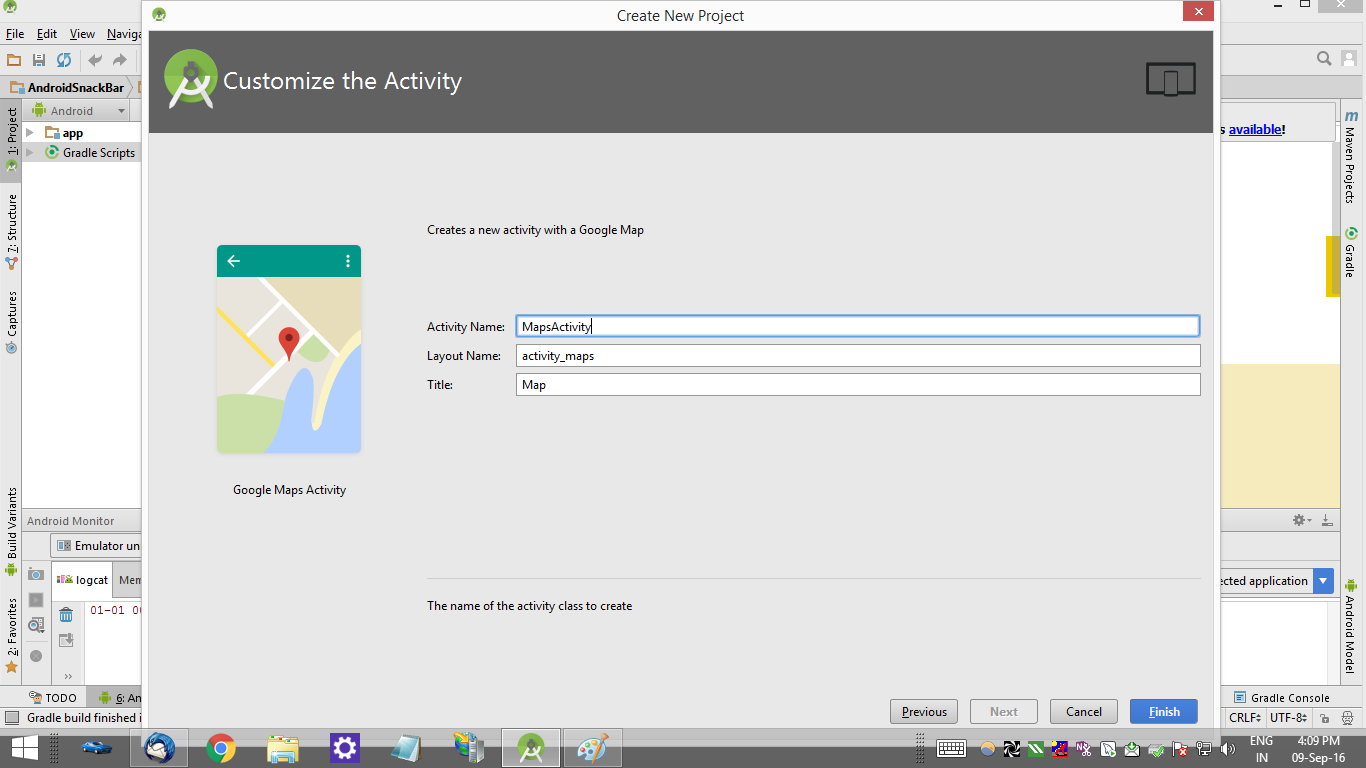
4.Give the Activity name as you wish and click Finish. Everything which is necessary to make this project will be added by Android studio itself.
Okay, so the project will be made, but there is one problem, you will have to obtain the Google Maps API key for using it your application.
Obtaining the API key for using Google Maps in Android application.
For obtaining Google Maps API key you will require google account and sign up in the Google developer console, don’t worry its absolutely free!
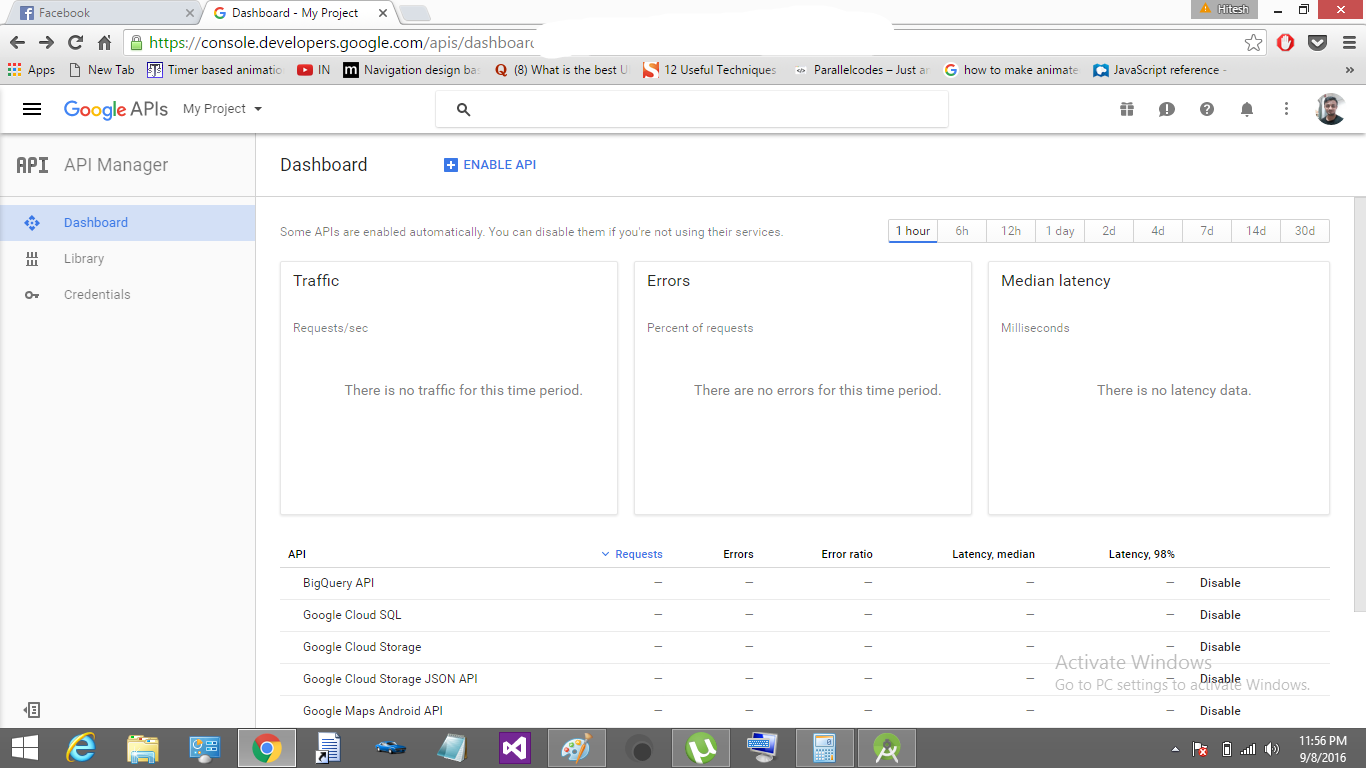
After Signing Up you will be welcomed with a screen as below :
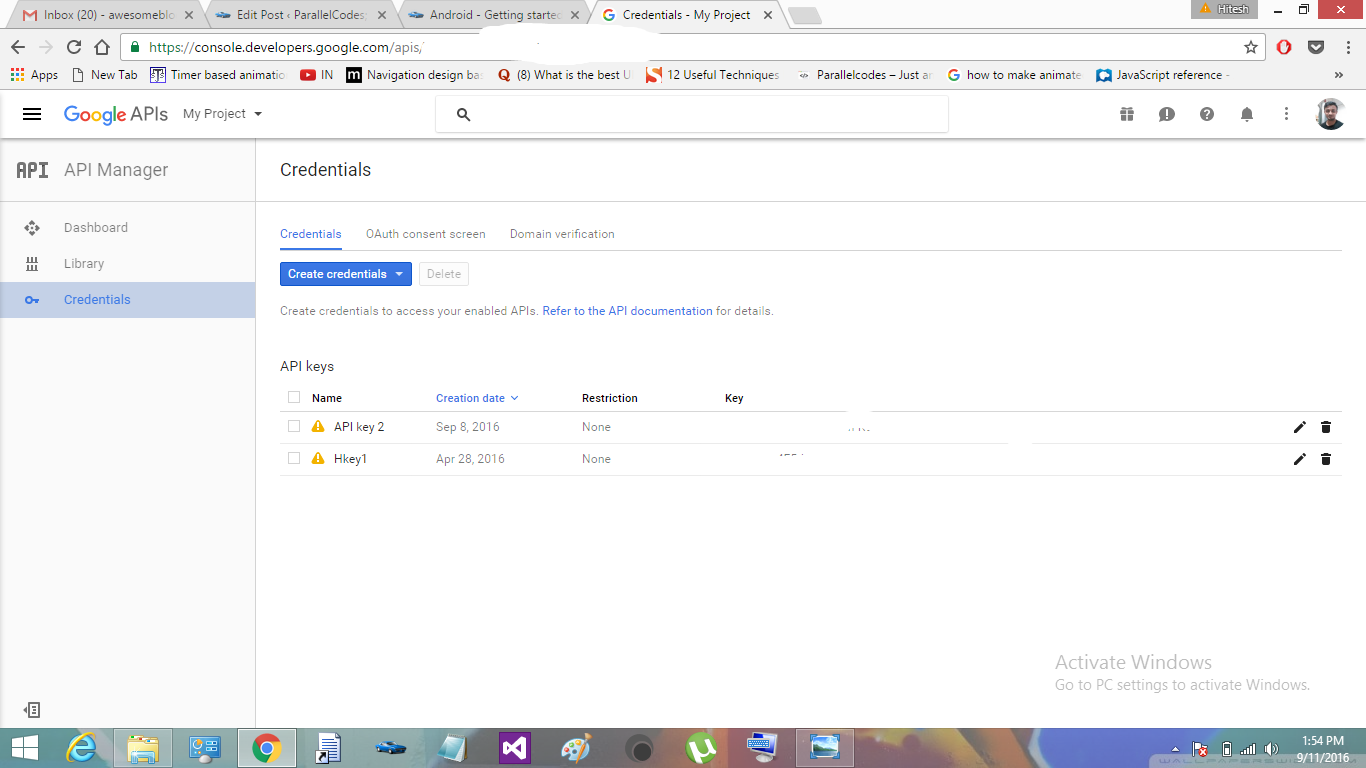
Click on the Credentials options on the left side and this screen will be shown :
Click on create credentials and on API Key.
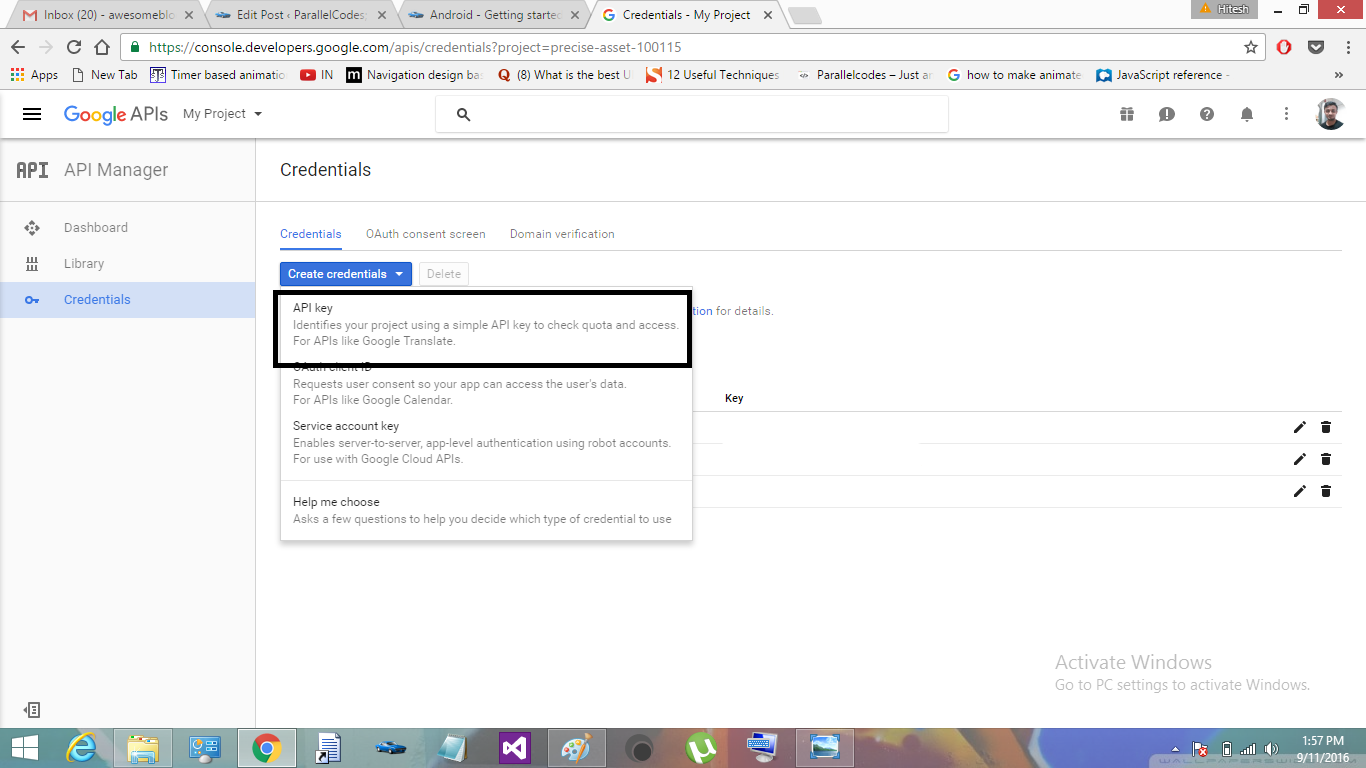
A new api key will be generated.
Click the Edit options available on each key listed in the grid.
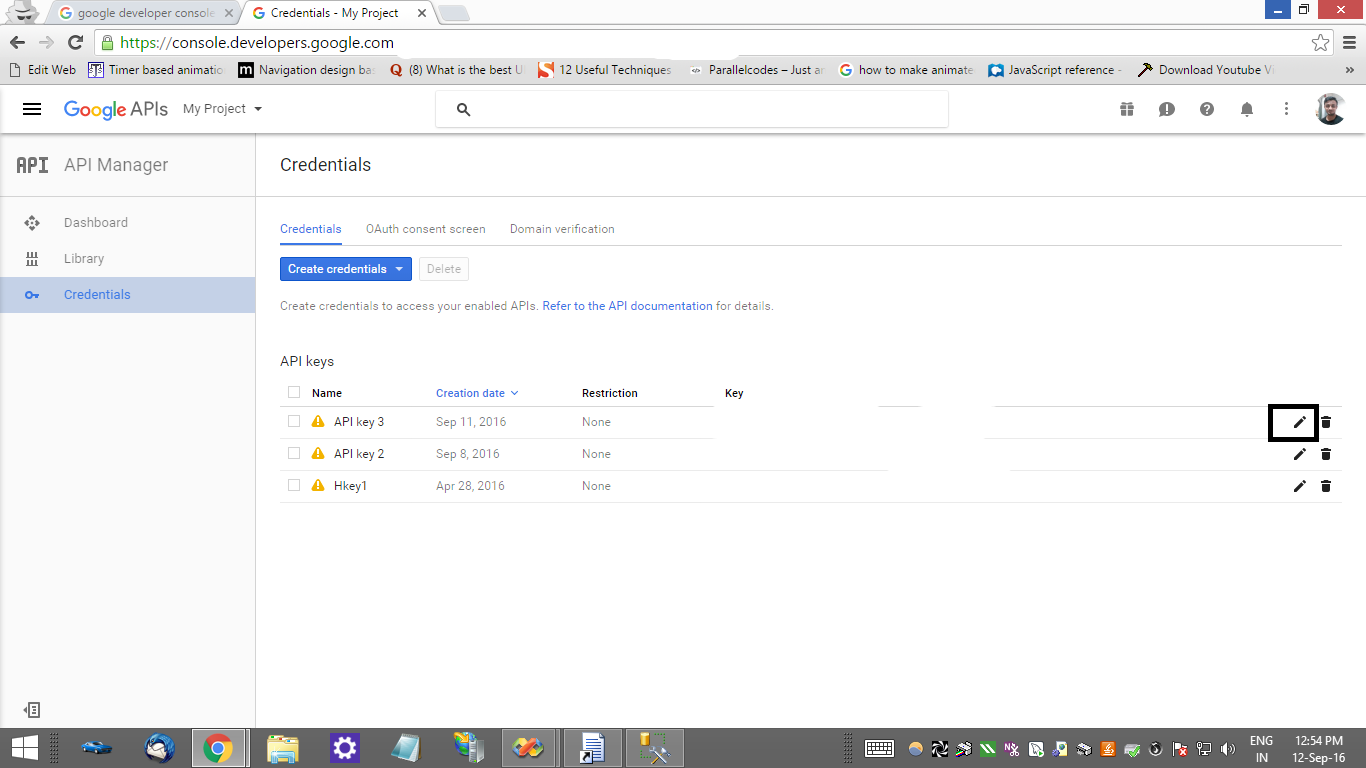
A new page will open up containing the settings options for the usage of the Google API Key.
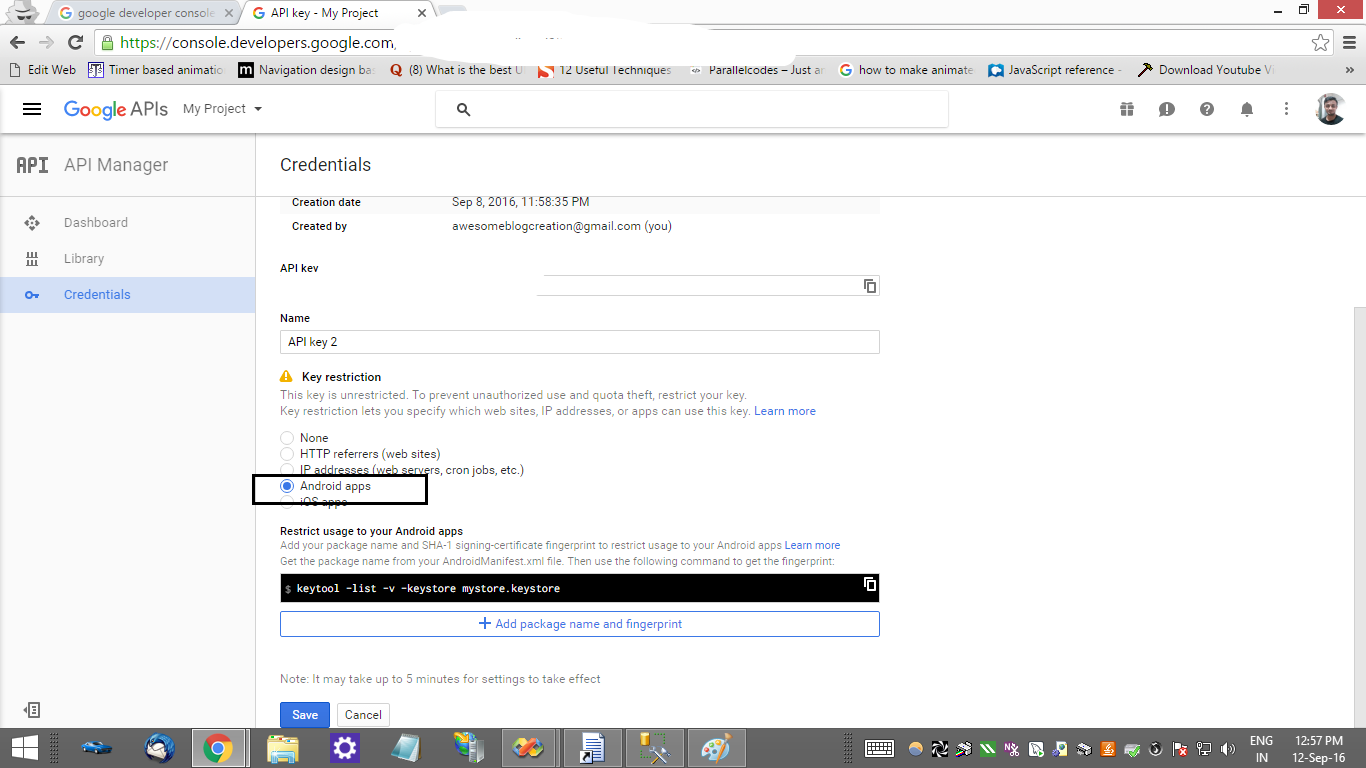
Select Android apps and copy and paste the API key value in your application project’s.
Using the Google Maps API Key in your Application
In your project, inside the res>values folder, a file name google_maps_api.xml will be present, if not please create it.
Copy paste the following string value in it.
google_maps_api.xml :
<resources>
<string name="google_maps_key" templateMergeStrategy="preserve" translatable="false">
YOUR GOOGLE MAP API KEY HERE</string>
</resources>
In your project>res>layout, there will be a layout file named activity_maps.xml (if not please create it.)
activity_maps.xml:
<fragment
xmlns:android="http://schemas.android.com/apk/res/android"
xmlns:map="http://schemas.android.com/apk/res-auto"
xmlns:tools="http://schemas.android.com/tools"
android:id="@+id/map"
android:name="com.google.android.gms.maps.SupportMapFragment"
android:layout_width="match_parent"
android:layout_height="match_parent"
android:layout_weight="match_parent"
tools:context="parallel.mymaps.MapsActivity" />
And also a class(.java file) with name MapsActivity.java if not please create it and edit it as following :
MapsActivity.java:
package parallel.mymaps;

import android.support.v4.app.FragmentActivity;
import android.os.Bundle;

import com.google.android.gms.maps.CameraUpdateFactory;
import com.google.android.gms.maps.GoogleMap;
import com.google.android.gms.maps.OnMapReadyCallback;
import com.google.android.gms.maps.SupportMapFragment;
import com.google.android.gms.maps.model.LatLng;
import com.google.android.gms.maps.model.MarkerOptions;

public class MapsActivity extends FragmentActivity implements OnMapReadyCallback {

private GoogleMap mMap;

@Override
protected void onCreate(Bundle savedInstanceState) {
super.onCreate(savedInstanceState);
setContentView(R.layout.activity_maps);
// Obtain the SupportMapFragment and get notified when the map is ready to be used.
SupportMapFragment mapFragment = (SupportMapFragment) getSupportFragmentManager()
.findFragmentById(R.id.map);
mapFragment.getMapAsync(this);
}
@Override
public void onMapReady(GoogleMap googleMap) {
mMap = googleMap;

// Add a marker in Sydney and move the camera
LatLng sydney = new LatLng(-34, 151);
mMap.addMarker(new MarkerOptions().position(sydney).title("Marker in Sydney"));
mMap.moveCamera(CameraUpdateFactory.newLatLng(sydney));
}
}
To run the application, you will need to add few permissions in your application (for using the location, gps, etc). Edit the AndroidManisfest.xml file as following :
AndroidManisfest.xml :
<?xml version="1.0" encoding="utf-8"?>
<manifest xmlns:android="http://schemas.android.com/apk/res/android"
package="parallel.mymaps">

<!--
The ACCESS_COARSE/FINE_LOCATION permissions are not required to use
Google Maps Android API v2, but you must specify either coarse or fine
location permissions for the 'MyLocation' functionality.
-->
<uses-permission android:name="android.permission.ACCESS_FINE_LOCATION" />
<uses-permission android:name="android.permission.ACCESS_COARSE_LOCATION" />
<uses-permission android:name="com.google.android.providers.gsf.permission.READ_GSERVICES" />
<uses-permission android:name="android.permission.INTERNET" />
<uses-permission android:name="com.example.androidmapsv2.permission.MAPS_RECEIVE" />

<application
android:allowBackup="true"
android:icon="@mipmap/ic_launcher"
android:label="@string/app_name"
android:supportsRtl="true"
android:theme="@style/AppTheme">

<!--
The API key for Google Maps-based APIs is defined as a string resource.
(See the file "res/values/google_maps_api.xml").
Note that the API key is linked to the encryption key used to sign the APK.
You need a different API key for each encryption key, including the release key
that is used to
sign the APK for publishing.
You can define the keys for the debug and release targets in src/debug/ and src/release/.
-->
<meta-data
android:name="com.google.android.geo.API_KEY"
android:value="@string/google_maps_key" />

<activity
android:name=".MapsActivity"
android:label="@string/title_activity_maps">
<intent-filter>
<action android:name="android.intent.action.MAIN" />

<category android:name="android.intent.category.LAUNCHER" />
</intent-filter>
</activity>
</application>

</manifest>
This is my build.gradle file :
build.gradle :
apply plugin: 'com.android.application'

android {
 compileSdkVersion 23
 buildToolsVersion "23.0.3"

defaultConfig {
 applicationId "parallel.mymaps"
 minSdkVersion 9
 targetSdkVersion 23
 versionCode 1
 versionName "1.0"
 }
 buildTypes {
 release {
 minifyEnabled false
 proguardFiles getDefaultProguardFile('proguard-android.txt'), 'proguard-rules.pro'
 }
 }
}

dependencies {
 compile fileTree(dir: 'libs', include: ['*.jar'])
 testCompile 'junit:junit:4.12'
 compile 'com.android.support:appcompat-v7:23.4.0'
 compile 'com.google.android.gms:play-services:9.0.1'
}
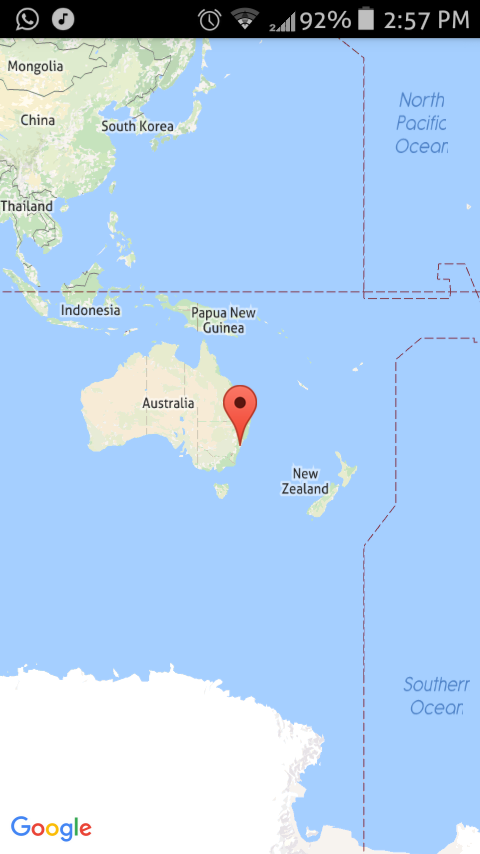
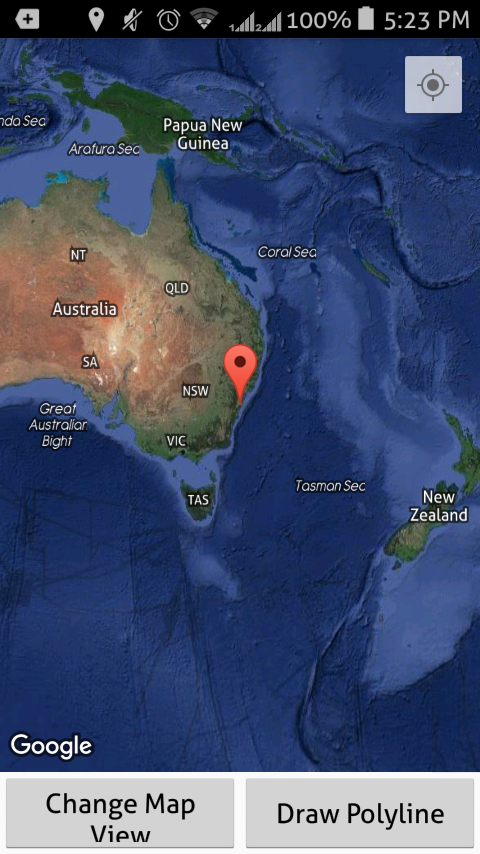
Now if run the project, you will see screen like below :
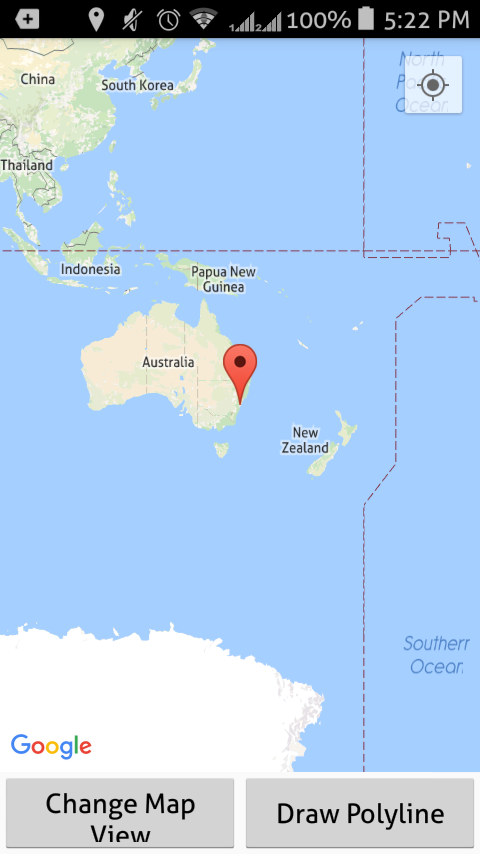
I will make some changes over here. I will be adding the functionality of adding polylines, add markers and Change map view. So first edit the xml layout file as below :
activity_maps.xml :
<LinearLayout
android:layout_width="match_parent"
android:layout_height="match_parent"
xmlns:android="http://schemas.android.com/apk/res/android"
android:weightSum="10"
android:orientation="vertical">
<fragment
xmlns:map="http://schemas.android.com/apk/res-auto"
xmlns:tools="http://schemas.android.com/tools"
android:id="@+id/map"
android:name="com.google.android.gms.maps.SupportMapFragment"
android:layout_width="match_parent"
android:layout_height="0dp"
android:layout_weight="9"
tools:context="parallel.mymaps.MapsActivity" />
<LinearLayout
android:layout_width="match_parent"
android:layout_height="0dp"
android:layout_weight="1"
android:orientation="horizontal"
android:weightSum="1">
<Button
android:id="@+id/btnChangeMapView"
android:layout_width="0dp"
android:layout_height="match_parent"
android:text="Change Map View"
android:layout_weight=".5"/>
<Button
android:id="@+id/btnDrawPolyline"
android:layout_width="0dp"
android:layout_height="match_parent"
android:text="Draw Polyline"
android:layout_weight=".5"/>
</LinearLayout>

</LinearLayout>
I’m adding two buttons one for changing the View of the map and other to add polyline.
And in java file, make these changes :
MapsActivity.java :
package parallel.mymaps;

import android.content.pm.PackageManager;
import android.graphics.Color;
import android.os.Bundle;
import android.support.v4.app.ActivityCompat;
import android.support.v4.app.FragmentActivity;
import android.view.View;
import android.widget.Button;

import com.google.android.gms.maps.CameraUpdate;
import com.google.android.gms.maps.CameraUpdateFactory;
import com.google.android.gms.maps.GoogleMap;
import com.google.android.gms.maps.OnMapReadyCallback;
import com.google.android.gms.maps.SupportMapFragment;
import com.google.android.gms.maps.model.LatLng;
import com.google.android.gms.maps.model.MarkerOptions;
import com.google.android.gms.maps.model.PolylineOptions;

public class MapsActivity extends FragmentActivity implements OnMapReadyCallback {

private GoogleMap mMap;
Button btnPolyline, btnChangeMapView;
LatLng tajMahal, eiffelTower;

@Override
protected void onCreate(Bundle savedInstanceState) {
super.onCreate(savedInstanceState);
setContentView(R.layout.activity_maps);
// Obtain the SupportMapFragment and get notified when the map is ready to be used.
btnPolyline = (Button) findViewById(R.id.btnDrawPolyline);
btnChangeMapView = (Button) findViewById(R.id.btnChangeMapView);
tajMahal = new LatLng(27.1750199, 78.0399665);
eiffelTower = new LatLng(48.8583736, 2.2922926);
SupportMapFragment mapFragment = (SupportMapFragment) getSupportFragmentManager()
.findFragmentById(R.id.map);
mapFragment.getMapAsync(this);

btnPolyline.setOnClickListener(new View.OnClickListener() {
@Override
public void onClick(View v) {
// 27.1750199,78.0399665
mMap.addPolyline(new PolylineOptions().add(tajMahal).add(eiffelTower).color(Color.BLUE)
.width(7));
CameraUpdate center = CameraUpdateFactory.newLatLng(tajMahal);
CameraUpdate zoom = CameraUpdateFactory.zoomTo(5);
mMap.addMarker(new MarkerOptions().position(tajMahal).title("Taj Mahal, Agra, India"));
mMap.addMarker(new MarkerOptions().position(eiffelTower).title("Eiffel Tower,Paris, France"));
mMap.moveCamera(center);
mMap.animateCamera(zoom);
}
});
btnChangeMapView.setOnClickListener(new View.OnClickListener() {
@Override
public void onClick(View v) {
if(mMap.getMapType() == GoogleMap.MAP_TYPE_HYBRID)
mMap.setMapType(GoogleMap.MAP_TYPE_NORMAL);
else if(mMap.getMapType()== GoogleMap.MAP_TYPE_NORMAL)
mMap.setMapType(GoogleMap.MAP_TYPE_SATELLITE);
else if(mMap.getMapType() == GoogleMap.MAP_TYPE_SATELLITE)
mMap.setMapType(GoogleMap.MAP_TYPE_TERRAIN);
else if(mMap.getMapType() == GoogleMap.MAP_TYPE_TERRAIN)
mMap.setMapType(GoogleMap.MAP_TYPE_NONE);
else if(mMap.getMapType() == GoogleMap.MAP_TYPE_NONE)
mMap.setMapType(GoogleMap.MAP_TYPE_HYBRID);

}
});

}

@Override
public void onMapReady(GoogleMap googleMap) {
mMap = googleMap;
if (ActivityCompat.checkSelfPermission(this, android.Manifest.permission.ACCESS_FINE_LOCATION)
!= PackageManager.PERMISSION_GRANTED && ActivityCompat.checkSelfPermission(this, android.Manifest.permission.ACCESS_COARSE_LOCATION) != PackageManager.PERMISSION_GRANTED) {
return;
} else {
mMap.setMyLocationEnabled(true);
}
// Add a marker in Sydney and move the camera
LatLng sydney = new LatLng(-34, 151);
mMap.addMarker(new MarkerOptions().position(sydney).title("Marker in Sydney"));
mMap.moveCamera(CameraUpdateFactory.newLatLng(sydney));
}
}

Code to change the view of the Google Maps in your application is :
mMap.setMapType(GoogleMap.MAP_TYPE_NORMAL);
mMap.setMapType(GoogleMap.MAP_TYPE_SATELLITE);
mMap.setMapType(GoogleMap.MAP_TYPE_TERRAIN);
mMap.setMapType(GoogleMap.MAP_TYPE_NONE);
mMap.setMapType(GoogleMap.MAP_TYPE_HYBRID);
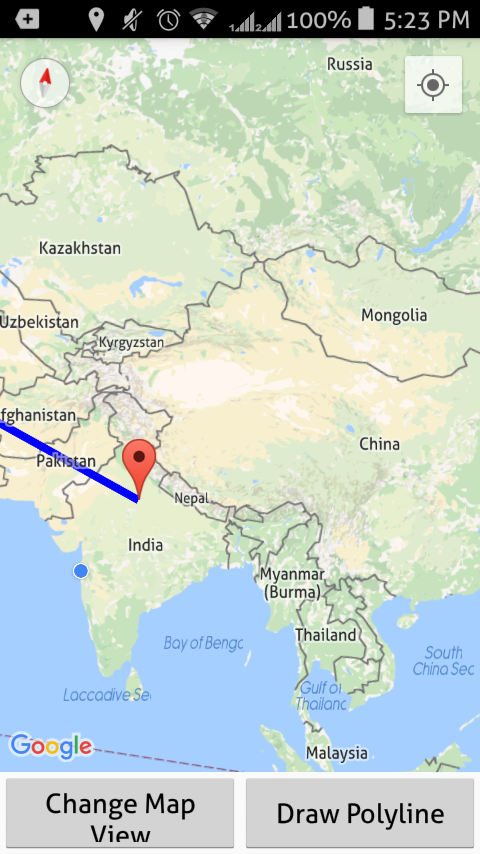
To draw a polyline in your Google Maps view use this code :
mMap.addPolyline(new PolylineOptions().add(LatLng1).add(LatLng2).color(Color.BLUE).width(7));
CameraUpdate center = CameraUpdateFactory.newLatLng(tajMahal);
where LatLng1 and LatLng2 are the two Latitude and Longitude values to the Points on
Google Maps.
To add Markers on Google Maps use this code :
mMap.addMarker(new MarkerOptions().position(LatLng1).title("Taj Mahal, Agra, India"));
mMap.addMarker(new MarkerOptions().position(LatLng2).title("Eiffel Tower,Paris, France"));
This post is just a basic look up on the functionality and basic features of Google Maps API in android. I will be posting few more posts in coming days on Polylines, Markers, Camera Update, Zoom, etc. in Google Maps for Android.