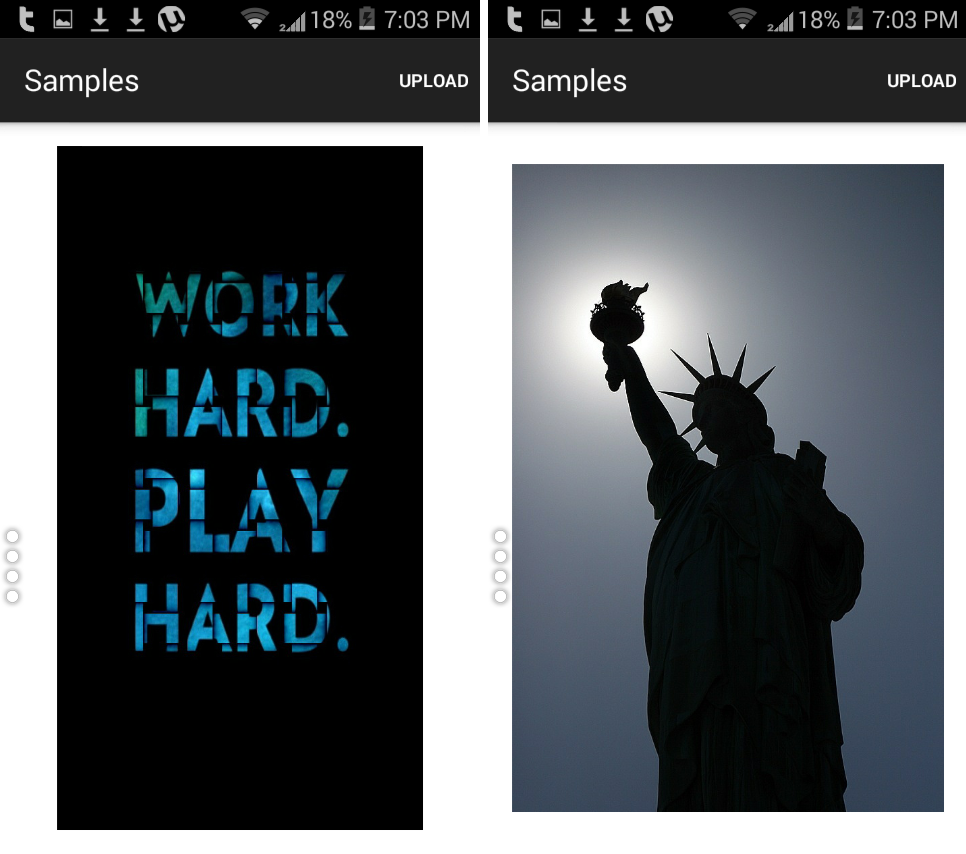
ANDROID IMAGEVIEW FROM FILE
A simple application showing how to set imageview from file (gallery, sdcard).
First create a new project in Android Studio with your desired name and package info.
Now open your activity_main.xml [its here res> layout > activity_main.xml] and make an imageview control in which we will be showing images from resources.
activity_main.xml
<RelativeLayout xmlns:android="http://schemas.android.com/apk/res/android"
xmlns:tools="http://schemas.android.com/tools"
android:layout_width="match_parent"
android:layout_height="match_parent"
android:background="#fff"
android:paddingBottom="@dimen/activity_vertical_margin"
android:paddingLeft="@dimen/activity_horizontal_margin"
android:paddingRight="@dimen/activity_horizontal_margin"
android:paddingTop="@dimen/activity_vertical_margin"
tools:context="com.example.samples.MainActivity" >

<ImageView
android:id="@+id/imageview1"
android:layout_width="match_parent"
android:layout_height="match_parent"
android:background="#fff"
android:src="@drawable/ic_launcher" />

</RelativeLayout>
Now open main.xml [its here res > menu > main.xml ]. and add a new menu item with name UPLOAD.
menu.xml
<menu xmlns:android="http://schemas.android.com/apk/res/android"
xmlns:app="http://schemas.android.com/apk/res-auto"
xmlns:tools="http://schemas.android.com/tools"
tools:context="com.example.samples.MainActivity" >

<item
android:id="@+id/upload"
android:orderInCategory="100"
android:title="UPLOAD"
app:showAsAction="always|withText"/>

</menu>
Now open your MainActivity.java and edit it as following:
package com.example.samples;

import java.io.FileNotFoundException;
import java.io.IOException;
import java.io.InputStream;

import android.app.Dialog;
import android.content.Intent;
import android.graphics.Bitmap;
import android.graphics.BitmapFactory;
import android.net.Uri;
import android.os.Bundle;
import android.os.Environment;
import android.provider.MediaStore;
import android.support.v7.app.ActionBarActivity;
import android.view.Menu;
import android.view.MenuItem;
import android.view.View;
import android.widget.ImageView;

public class MainActivity extends ActionBarActivity {

public static final int requestcode = 1;
ImageView img;
Dialog m;

@Override
protected void onCreate(Bundle savedInstanceState) {
super.onCreate(savedInstanceState);
setContentView(R.layout.activity_main);

img = (ImageView) findViewById(R.id.imageview1);
m = new Dialog(this);
}

@Override
public boolean onCreateOptionsMenu(Menu menu) {
// Inflate the menu; this adds items to the action bar if it is present.
getMenuInflater().inflate(R.menu.main, menu);
return true;
}

@Override
public boolean onOptionsItemSelected(MenuItem item) {
// Handle action bar item clicks here. The action bar will
// automatically handle clicks on the Home/Up button, so long
// as you specify a parent activity in AndroidManifest.xml.
int id = item.getItemId();
if (id == R.id.upload) {
if (Environment.getExternalStorageState().equals(
Environment.MEDIA_MOUNTED)
&& !Environment.getExternalStorageState().equals(
Environment.MEDIA_CHECKING)) {
Intent intent = new Intent(Intent.ACTION_PICK);
intent.setType("image/*");
startActivityForResult(intent, 1);

} else {

}
return true;
}
return super.onOptionsItemSelected(item);
}

@Override
protected void onActivityResult(int requestCode, int resultCode, Intent data) {
super.onActivityResult(requestCode, resultCode, data);

// Detects request codes
if (resultCode == RESULT_OK) {
Bitmap originBitmap = null;
Uri selectedImage = data.getData();
InputStream imageStream;
try {
imageStream = getContentResolver().openInputStream(
selectedImage);
originBitmap = BitmapFactory.decodeStream(imageStream);
} catch (FileNotFoundException e) {
// TODO Auto-generated catch block
e.printStackTrace();
}
if (originBitmap != null) {
this.img.setImageBitmap(originBitmap);
}
} else {
m.setTitle(String.valueOf(requestCode));
m.show();

}
}
}
Add the read and write permissions in your AndroidManifest.xml file.
AndroidManifest.xml
<?xml version="1.0" encoding="utf-8"?>
<manifest xmlns:android="http://schemas.android.com/apk/res/android"
package="com.example.samples"
android:versionCode="1"
android:versionName="1.0" >

<uses-sdk
android:minSdkVersion="8"
android:targetSdkVersion="21" />

<uses-permission android:name="android.permission.READ_EXTERNAL_STORAGE" />
<uses-permission android:name="android.permission.WRITE_EXTERNAL_STORAGE" />

<application
android:allowBackup="true"
android:icon="@drawable/ic_launcher"
android:label="@string/app_name"
android:theme="@style/AppTheme" >
<activity
android:name=".MainActivity"
android:label="@string/app_name" >
<intent-filter>
<action android:name="android.intent.action.MAIN" />

<category android:name="android.intent.category.LAUNCHER" />
</intent-filter>
</activity>
</application>

</manifest>


Pingback: Android JSON Parsing • ParallelCodes
Pingback: Android Game Tutorial • ParallelCodes
Pingback: Connect Android to MS SQL Database. • ParallelCodes