
Android Material design
Android material design changes everything in application interface design. It challenges every UI available on mobile platform including iOS apps. With material UI design every apps looks cool and funky and lots of cool flat colors.
To know more about the UI changes follow the links :
What’s new in Material Design :
- Completely new UI with fresh design
- Bye Bye Action Bar…Welcome Toolbar!!!
- Flat Colors
- SnackBar
Some Basics :
- Colors.xml – You have to define colorPrimary,colorPrimaryDark,colorAccent in your colors.xml to define the basics colors of your application.
<?xml version="1.0" encoding="utf-8"?>
<resources>
 <color name="colorPrimary">#3F51B5</color>
 <color name="colorPrimaryDark">#303F9F</color>
 <color name="colorAccent">#FF4081</color>
</resources>
- Toolbar – The toolbar replaces the Actionbar. It provides more functionality over it. For more on it refer : Why actionbar was deprecated.
- Snackbar – Snackbar looks good and replaces the toast activity. It provides more functionality over the Toast pop up.
Here’s an example of making a good looking Login screen design with material guide lines. I have not included a password field.
Create a blank project in Android Studio.
Open the style.xml file res>values>styles.xml and create following styles in it.
styles.xml :
<resources>

<!-- Base application theme. -->
 <style name="AppTheme" parent="Theme.AppCompat.Light.DarkActionBar">
 <!-- Customize your theme here. -->
 <item name="colorPrimary">@color/colorPrimary</item>
 <item name="colorPrimaryDark">@color/colorPrimaryDark</item>
 <item name="colorAccent">@color/colorAccent</item>
 </style>

<style name="AppTheme.NoActionBar">
 <item name="windowActionBar">false</item>
 <item name="windowNoTitle">true</item>
 </style>

<style name="AppTheme.AppBarOverlay" parent="ThemeOverlay.AppCompat.Dark.ActionBar" />

<style name="AppTheme.PopupOverlay" parent="ThemeOverlay.AppCompat.Light" />

<style name="AppTheme.Button" parent="Widget.AppCompat.Button.Colored">
 <item name="colorButtonNormal">@color/colorPrimaryDark</item>
 </style>
 <style name="AppTheme.ButtonBorderless" parent="Widget.AppCompat.Button.Borderless.Colored">

</style>

</resources>
And define the following colors in the colors.xml file (res>values>colors.xml)
colors.xml:
<?xml version="1.0" encoding="utf-8"?>
<resources>
 <color name="colorPrimary">#fa3f7f</color>
 <color name="colorPrimaryDark">#6f0647</color>
 <color name="colorAccent">#FF4081</color>
</resources>
To define a custom toolbar in your layout, use following lines of code :
Toolbar code:
<android.support.design.widget.AppBarLayout
 android:layout_width="match_parent"
 android:layout_height="wrap_content"
 android:theme="@style/AppTheme.AppBarOverlay"><android.support.v7.widget.Toolbar
 android:id="@+id/toolbar"
 android:layout_width="match_parent"
 android:layout_height="?attr/actionBarSize"
 android:background="?attr/colorPrimary"
 app:popupTheme="@style/AppTheme.PopupOverlay" /></android.support.design.widget.AppBarLayout>
To get the textbox effect of the material design use following lines of codes :
Android TextInputLayout:
<android.support.design.widget.TextInputLayout
 android:id="@+id/tilname"
 android:layout_width="match_parent"
 android:layout_height="wrap_content"
 android:layout_below="@+id/lv1"
 android:padding="2dp">
<AutoCompleteTextView
 android:id="@+id/txtname"
 android:layout_width="match_parent"
 android:layout_height="wrap_content"
 android:hint="Enter Your Name"
 android:inputType="text"
 android:maxLines="1"
 android:singleLine="true" />
</android.support.design.widget.TextInputLayout>
So the complete design code of our login page (res>layout>activity_mail.xml) would be like following :
activity_main.xml:
<?xml version="1.0" encoding="utf-8"?>
<RelativeLayout xmlns:android="http://schemas.android.com/apk/res/android"
 xmlns:app="http://schemas.android.com/apk/res-auto"
 xmlns:tools="http://schemas.android.com/tools"
 android:layout_width="match_parent"
 android:layout_height="match_parent">
<android.support.design.widget.AppBarLayout
 android:layout_width="match_parent"
 android:layout_height="wrap_content"
 android:theme="@style/AppTheme.AppBarOverlay">
<android.support.v7.widget.Toolbar
 android:id="@+id/toolbar"
 android:layout_width="match_parent"
 android:layout_height="?attr/actionBarSize"
 android:background="?attr/colorPrimary"
 app:popupTheme="@style/AppTheme.PopupOverlay" />
</android.support.design.widget.AppBarLayout>
<RelativeLayout
 android:padding="10dp"
 android:layout_width="match_parent"
 android:layout_height="match_parent">
<LinearLayout
 android:id="@+id/lv1"
 android:layout_width="match_parent"
 android:layout_height="wrap_content"
 android:layout_marginTop="70dp"
 android:orientation="horizontal"
 android:padding="10dp"
 android:weightSum="2">
<ImageView
 android:layout_width="0dp"
 android:layout_height="wrap_content"
 android:layout_weight="0.7"
 android:gravity="left"
 android:src="@drawable/ic_signup" />
<TextView
 android:layout_width="0dp"
 android:layout_height="match_parent"
 android:layout_weight="1.3"
 android:gravity="center_vertical"
 android:textStyle="bold"
 android:text="Register with us"
 android:textSize="20dp" />
 </LinearLayout>
 <android.support.design.widget.TextInputLayout
 android:id="@+id/tilname"
 android:layout_width="match_parent"
 android:layout_height="wrap_content"
 android:layout_below="@+id/lv1"
 android:padding="2dp">
<AutoCompleteTextView
 android:id="@+id/txtname"
 android:layout_width="match_parent"
 android:layout_height="wrap_content"
 android:hint="Enter Your Name"
 android:inputType="text"
 android:maxLines="1"
 android:singleLine="true" />
</android.support.design.widget.TextInputLayout>
<android.support.design.widget.TextInputLayout
 android:id="@+id/tilemail"
 android:layout_width="match_parent"
 android:layout_height="wrap_content"
 android:layout_below="@+id/tilname"
 android:padding="2dp">
<AutoCompleteTextView
 android:id="@+id/txtemail"
 android:layout_width="match_parent"
 android:layout_height="wrap_content"
 android:hint="Enter Your Email"
 android:inputType="textEmailAddress"
 android:maxLines="1"
 android:singleLine="true" />
</android.support.design.widget.TextInputLayout>
<android.support.design.widget.TextInputLayout
 android:id="@+id/tilmobileno"
 android:layout_width="match_parent"
 android:layout_height="wrap_content"
 android:layout_below="@+id/tilemail"
 android:padding="2dp">
<AutoCompleteTextView
 android:id="@+id/txtmobileno"
 android:layout_width="match_parent"
 android:layout_height="wrap_content"
 android:hint="Enter Your Mobile No."
 android:inputType="number"
 android:maxLines="1"
 android:singleLine="true" />
</android.support.design.widget.TextInputLayout>
<Button
 android:id="@+id/btnSignUp"
 android:layout_height="wrap_content"
 android:layout_width="match_parent"
 android:layout_below="@+id/tilmobileno"
 android:textColor="#fff"
 android:theme="@style/AppTheme.Button"
 android:text="Sign Up" />
<Button
 android:id="@+id/btnClear"
 android:layout_height="wrap_content"
 android:layout_width="match_parent"
 android:layout_below="@+id/btnSignUp"
 android:textColor="@color/colorAccent"
 android:background="#fff"
 android:theme="@style/AppTheme.ButtonBorderless"
 android:text="Clear" />
 </RelativeLayout>
 <android.support.design.widget.CoordinatorLayout
 xmlns:android="http://schemas.android.com/apk/res/android"
 xmlns:app="http://schemas.android.com/apk/res-auto"
 xmlns:tools="http://schemas.android.com/tools"
 android:id="@+id/coordinatorLayout"
 android:layout_width="match_parent"
 android:layout_height="wrap_content"
 android:layout_alignParentBottom="true"
 ></android.support.design.widget.CoordinatorLayout>
</RelativeLayout>
This code will generate following design of our page :
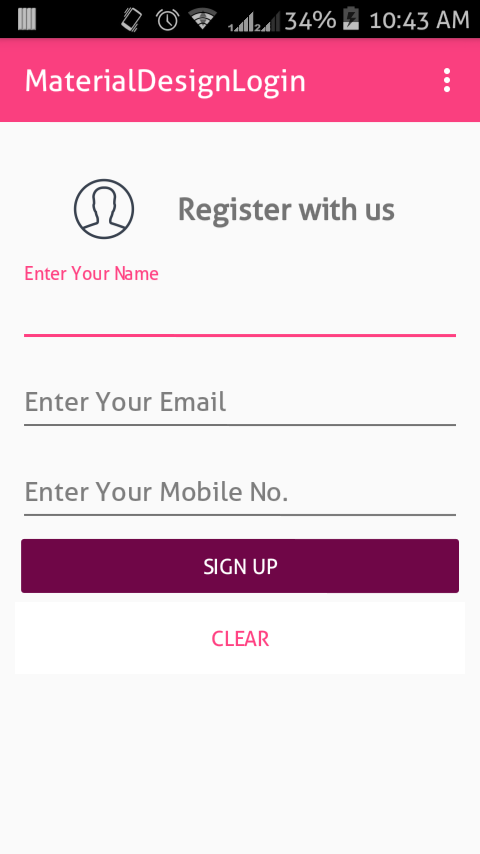
Now the code for making the validation is something like this :
textboxId.setError(“Error message to show”);
And to show the snackbar :
Snackbar snackbar = Snackbar
.make(coordinatorLayoutID, “Success”, Snackbar.LENGTH_LONG)
.setAction(“HIDE”, new View.OnClickListener() {
@Override
public void onClick(View view) {
}
});snackbar.show();
So the complete code will be like this : (src>MainActivity.java)
MainActivity.java:
package h.materialdesignlogin;
import android.os.Bundle;
import android.support.design.widget.CoordinatorLayout;
import android.support.design.widget.Snackbar;
import android.support.v7.app.AppCompatActivity;
import android.support.v7.widget.Toolbar;
import android.view.Menu;
import android.view.MenuItem;
import android.view.View;
import android.widget.AutoCompleteTextView;
import android.widget.Button;
public class MainActivity extends AppCompatActivity {
Button btnSignUp, btnClear;
 AutoCompleteTextView txtmobileno, txtemail, txtname;
 private CoordinatorLayout coordinatorLayout;
@Override
 protected void onCreate(Bundle savedInstanceState) {
 super.onCreate(savedInstanceState);
 setContentView(R.layout.activity_main);
 Toolbar toolbar = (Toolbar) findViewById(R.id.toolbar);
 setSupportActionBar(toolbar);
 coordinatorLayout = (CoordinatorLayout) findViewById(R.id
 .coordinatorLayout);
 txtemail = (AutoCompleteTextView) findViewById(R.id.txtemail);
 txtmobileno = (AutoCompleteTextView) findViewById(R.id.txtmobileno);
 txtname = (AutoCompleteTextView) findViewById(R.id.txtname);
btnSignUp = (Button) findViewById(R.id.btnSignUp);
 btnClear = (Button) findViewById(R.id.btnClear);
btnSignUp.setOnClickListener(new View.OnClickListener() {
 @Override
 public void onClick(View v) {
 String email = txtemail.getText().toString();
 String mobileno = txtmobileno.getText().toString();
 String name = txtemail.getText().toString();
 if (name.trim().equals(""))
 txtname.setError("Please enter your name");
 else if (email.trim().equals(""))
 txtemail.setError("Please enter email Address");
 else if (!email.contains("@") || !email.contains("."))
 txtemail.setError("Please enter a valid email Address");
else if (mobileno.trim().length() < 10)
 txtmobileno.setError("Not a valid mobile no"); // I'm finding solution to validate mobile no
 else {
 Snackbar snackbar = Snackbar
 .make(coordinatorLayout, "Success", Snackbar.LENGTH_LONG)
 .setAction("HIDE", new View.OnClickListener() {
 @Override
 public void onClick(View view) {
 }
 });
snackbar.show();
 }
 }
 });
btnClear.setOnClickListener(new View.OnClickListener() {
 @Override
 public void onClick(View v) {
 txtemail.setText("");
 txtmobileno.setText("");
 txtname.setText("");
 txtname.setError(null);
 txtemail.setError(null);
 txtmobileno.setError(null);
}
 });
 }
@Override
 public boolean onCreateOptionsMenu(Menu menu) {
 // Inflate the menu; this adds items to the action bar if it is present.
 getMenuInflater().inflate(R.menu.menu_main, menu);
 return true;
 }
@Override
 public boolean onOptionsItemSelected(MenuItem item) {
 // Handle action bar item clicks here. The action bar will
 // automatically handle clicks on the Home/Up button, so long
 // as you specify a parent activity in AndroidManifest.xml.
 int id = item.getItemId();
//noinspection SimplifiableIfStatement
 if (id == R.id.action_settings) {
 return true;
 }
return super.onOptionsItemSelected(item);
 }
}
And AndroidManisfest.xml file :
AndroidManisfest.xml:
<?xml version="1.0" encoding="utf-8"?>
<manifest xmlns:android="http://schemas.android.com/apk/res/android"
 package="h.materialdesignlogin">
<application
 android:allowBackup="true"
 android:icon="@mipmap/ic_launcher"
 android:label="@string/app_name"
 android:supportsRtl="true"
 android:theme="@style/AppTheme">
 <activity
 android:name=".MainActivity"
 android:label="@string/app_name"
 android:theme="@style/AppTheme.NoActionBar">
 <intent-filter>
 <action android:name="android.intent.action.MAIN" />
<category android:name="android.intent.category.LAUNCHER" />
 </intent-filter>
 </activity>
 </application>
</manifest>
You can download the code from here : Github link
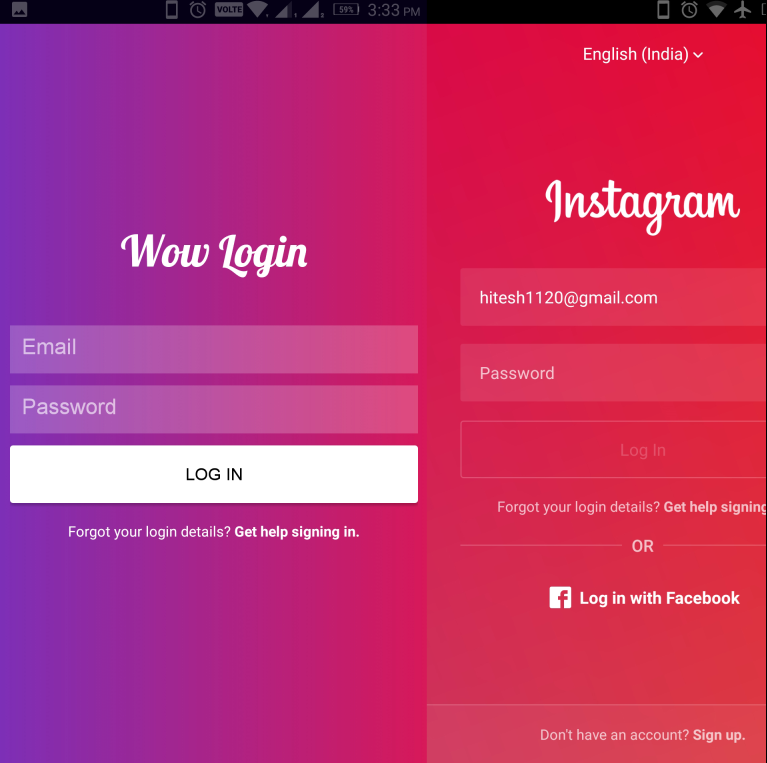
Instagram like Login screen Android Studio.
Pingback: Android Login Screen Design - Login Portal
Pingback: Android Login And Registration Screen Design - Login Portal
Pingback: Android Material Design Login Form - Login Portal
Pingback: material login screen android Online Portal Client Support Activation Password Information - banklogining.com
Pingback: material login page android Online Portal Client Support Activation Password Information - banklogining.com
Pingback: material design login screen android xml Online Portal Client Support Activation Password Information - banklogining.com
Pingback: material design login screen example Online Portal Client Support Activation Password Information - banklogining.com
Pingback: material design login screen android studio Online Portal Client Support Activation Password Information - banklogining.com
Pingback: material design login screen android Online Portal Client Support Activation Password Information - banklogining.com
Pingback: material design login screen Online Portal Client Support Activation Password Information - banklogining.com
Pingback: Material login ui android studio - Ui login
Pingback: Material Design Screen Logga In – Sweden Logga In