Hi Guys. In this post we will learn how we can create ASP.NET login page with SQL database as its datasource. We will create a login page linked to our MS SQL database server table. Create a ASP.NET website project in visual studio. I’m using Visual studio 2017 and SQL server 2014. I will provide database script for this example below.
DOWNLOAD SOURCE CODE
Database script:
Create database ASPNET
USE ASPNET

CREATE TABLE [dbo].[tblUsers](
[Id] [int] IDENTITY(1,1) NOT NULL,
[UserId] [varchar](50) NOT NULL,
[Password] [nvarchar](50) NOT NULL
)
-------------------
create proc [dbo].[sp_login]
(
@UserId varchar(50), @Password nvarchar(50)
)
as
begin
Select * from tblUsers where UserId=@UserId and password=@Password
end;
GO
-----------------------------
Insert into tblUsers (UserId,Password) values ('hitesh','789');
Insert into tblUsers (UserId,Password) values ('steve','123')
Create an ASPX page in your project with name Login.aspx and edit it as below:
Login.aspx:
<%@ Page Language="C#" AutoEventWireup="true" CodeBehind="Dashboard.aspx.cs" Inherits="LoginApp.Dashboard" %>

<!DOCTYPE html>

<html xmlns="http://www.w3.org/1999/xhtml">
<head runat="server">
<title>User Dashboard</title>

<link rel="stylesheet" href="https://stackpath.bootstrapcdn.com/bootstrap/4.4.1/css/bootstrap.min.css" integrity="sha384-Vkoo8x4CGsO3+Hhxv8T/Q5PaXtkKtu6ug5TOeNV6gBiFeWPGFN9MuhOf23Q9Ifjh" crossorigin="anonymous"/>
</head>
<body>
<form id="form1" runat="server">
<div>
<asp:Label runat="server" ID="txtUserName" />
</div>
</form>
</body>
</html>
Now edit its code behind like below:
Login.aspx.cs:
using System;
using System.Collections.Generic;
using System.Linq;
using System.Web;
using System.Web.UI;
using System.Web.UI.WebControls;
using System.Data;
using System.Data.SqlClient;

namespace LoginApp
{
public partial class Login : System.Web.UI.Page
{
static string connectionString = @"Data Source=VIBES;Initial Catalog=ASPNET;User ID=sa;Password=789";
protected void Page_Load(object sender, EventArgs e)
{

}

protected void btnLogin_Click(object sender, EventArgs e)
{
try
{
SqlConnection con = new SqlConnection(connectionString);
SqlCommand cmd = new SqlCommand();
cmd.CommandText = "sp_login";
cmd.CommandType = CommandType.StoredProcedure;
cmd.Parameters.AddWithValue("@UserId", txtUserId.Text.ToString());
cmd.Parameters.AddWithValue("@Password", txtPassword.Text.ToString());
cmd.Connection = con;
con.Open();
SqlDataReader reader = cmd.ExecuteReader();
if(reader.Read())
{
Session["UserId"] = txtUserId.Text.ToString();
txtInfo.Text = "Login Successful!";

reader.Close();
con.Close();

Response.Redirect("~/Dashboard.aspx");
}
else
{
txtInfo.Text = "Invalid credentials";
}

reader.Close();

con.Close();

}
catch(Exception ex)
{

}
}
}
}
We button click method we are connecting our page with sql server database using the connectionString object and checking if the user exists in our users table. We are using the SQL stored procedure which we created for our login process at the beginning of this post. If the SQL reader gets a valid login user, we will forward our user to Dashboard page and stored the Login userid in ASP.NET session object. For more on how to use session, please see this post.
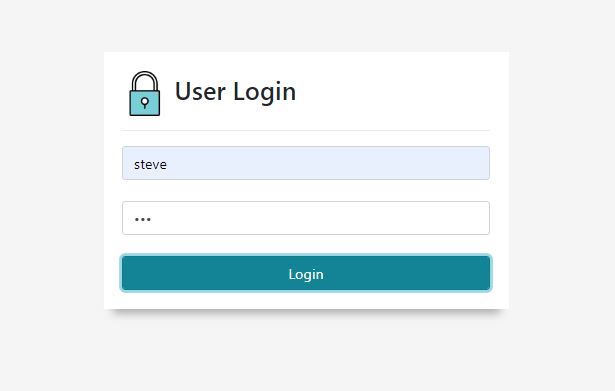
login_page_snap
Create another page with name Dashboard.aspx and edit it as below
Dashboard.aspx:
<%@ Page Language="C#" AutoEventWireup="true" CodeBehind="Dashboard.aspx.cs" Inherits="LoginApp.Dashboard" %>

<!DOCTYPE html>

<html xmlns="http://www.w3.org/1999/xhtml">
<head runat="server">
<title>User Dashboard</title>

<link rel="stylesheet" href="https://stackpath.bootstrapcdn.com/bootstrap/4.4.1/css/bootstrap.min.css"
integrity="sha384-Vkoo8x4CGsO3+Hhxv8T/Q5PaXtkKtu6ug5TOeNV6gBiFeWPGFN9MuhOf23Q9Ifjh" crossorigin="anonymous"/>
</head>
<body>
<form id="form1" runat="server">
<div>

<asp:Label runat="server" ID="txtUserName" />
</div>
</form>
</body>
</html>
And edit its code behind as below:
Dashboard.aspx.cs:
using System;

namespace LoginApp
{
public partial class Dashboard : System.Web.UI.Page
{
protected void Page_Load(object sender, EventArgs e)
{
try
{
txtUserName.Text = "Welcome "+ Session["UserId"].ToString();
}
catch(Exception ex)
{

}
}
}
}
This page is only having an ASP.NET label to show login user userid on it using ASP.NET session object which we stored on Login page process. Now run your project.
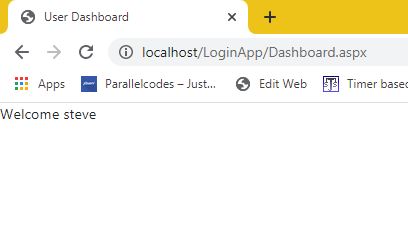
login result