In this post let’s see how we can scroll Android ListView both Horizontally and Vertically.
For making Android Listview Horizontal scroll possible we can use “HorizontalScrollView”. Let’s see how we can implement HorizontalScrollView to make our Android Listview scroll in both directions i.e. Horizontally as well as Vertically.
Android How to Scroll ListView Horizontally and Vertically?
In your Android studio project open the activity_main.xml file and edit it as below:
activity_main.xml:
<?xml version="1.0" encoding="utf-8"?>
<LinearLayout xmlns:android="http://schemas.android.com/apk/res/android"
xmlns:app="http://schemas.android.com/apk/res-auto"
xmlns:tools="http://schemas.android.com/tools"
android:layout_width="match_parent"
android:layout_height="match_parent"
android:orientation="vertical"
android:weightSum="1"
tools:context=".MainActivity">

<HorizontalScrollView
android:layout_width="match_parent"
android:layout_height="match_parent">

<LinearLayout
android:layout_width="match_parent"
android:layout_height="match_parent"
android:background="@android:color/holo_blue_light"
android:orientation="vertical">

<LinearLayout
android:layout_width="match_parent"
android:layout_height="wrap_content"
android:background="#888888"
android:orientation="horizontal">

<TextView
android:id="@+id/txtItemRef"
android:layout_width="100dp"
android:layout_height="wrap_content"
android:layout_margin="1dp"
android:text="Item Ref"
android:textColor="#000"
android:textSize="20sp"
android:textStyle="bold" />
<TextView
android:id="@+id/txtItemName"
android:layout_width="100dp"
android:layout_height="wrap_content"
android:layout_margin="1dp"
android:text="Item name"
android:textColor="#000"
android:textSize="20sp"
android:textStyle="bold" />

<TextView
android:id="@+id/txtSupp"
android:layout_width="100dp"
android:layout_height="wrap_content"
android:layout_margin="1dp"
android:text="Supplier"
android:textColor="#000"
android:textSize="20sp"
android:textStyle="bold" />

<TextView
android:id="@+id/txtLatest"
android:layout_width="100dp"
android:layout_height="wrap_content"
android:layout_margin="1dp"
android:text="Latest Stock"
android:textColor="#000"
android:textSize="20sp"
android:textStyle="bold" />

<TextView
android:id="@+id/txtSale"
android:layout_width="100dp"
android:layout_height="wrap_content"
android:layout_margin="1dp"
android:text="Sale Price"
android:textColor="#000"
android:textSize="20sp"
android:textStyle="bold" />

<TextView
android:id="@+id/txtBin"
android:layout_width="100dp"
android:layout_height="wrap_content"
android:layout_margin="1dp"
android:text="Bin number"
android:textColor="#000"
android:textSize="20sp"
android:textStyle="bold" />

<TextView
android:id="@+id/txtBalance"
android:layout_width="100dp"
android:layout_height="wrap_content"
android:layout_margin="1dp"
android:text="Balance"
android:textColor="#000"
android:textSize="20sp"
android:textStyle="bold" />

</LinearLayout>

<ListView
android:id="@+id/lstStockItems"
android:layout_width="match_parent"
android:layout_height="wrap_content"
android:background="@android:color/holo_orange_dark"
android:scrollbars="horizontal|vertical" />
</LinearLayout>
</HorizontalScrollView>

</LinearLayout>
Now create a new layout file named lst_items.xml and edit it as below. This file will work as template or layout resource file for our ListView.
lst_items.xml:
<?xml version="1.0" encoding="utf-8"?>
<LinearLayout xmlns:android="http://schemas.android.com/apk/res/android"
android:id="@+id/lvTemplate"
android:layout_width="match_parent"
android:layout_height="match_parent"
android:background="#fff"
android:orientation="horizontal">

<TextView
android:id="@+id/txtItemRef"
android:layout_width="100dp"
android:layout_height="wrap_content"
android:layout_margin="1dp"
android:text="Item Ref"
android:textSize="20sp"
android:textColor="#000" />

<TextView
android:id="@+id/txtItemName"
android:layout_width="100dp"
android:layout_height="wrap_content"
android:layout_margin="1dp"
android:text="Item name"
android:textSize="20sp"
android:textColor="#000" />

<TextView
android:id="@+id/txtSupplier"
android:layout_width="100dp"
android:layout_height="wrap_content"
android:layout_margin="1dp"
android:textSize="20sp"
android:text="Supplier"
android:textColor="#000" />

<TextView
android:id="@+id/txtLatestStock"
android:layout_width="100dp"
android:layout_height="wrap_content"
android:layout_margin="1dp"
android:text="Latest Stock"
android:textSize="20sp"
android:textColor="#000" />

<TextView
android:id="@+id/txtSalePrice"
android:layout_width="100dp"
android:layout_height="wrap_content"
android:layout_margin="1dp"
android:text="Sale Price"
android:textSize="20sp"
android:textColor="#000" />

<TextView
android:id="@+id/txtBinNumber"
android:layout_width="100dp"
android:layout_height="wrap_content"
android:layout_margin="1dp"
android:textSize="20sp"
android:text="Bin number"
android:textColor="#000" />

<TextView
android:id="@+id/txtBalance"
android:layout_width="100dp"
android:textSize="20sp"
android:layout_height="wrap_content"
android:layout_margin="1dp"
android:text="Balance"
android:textColor="#000" />

</LinearLayout>
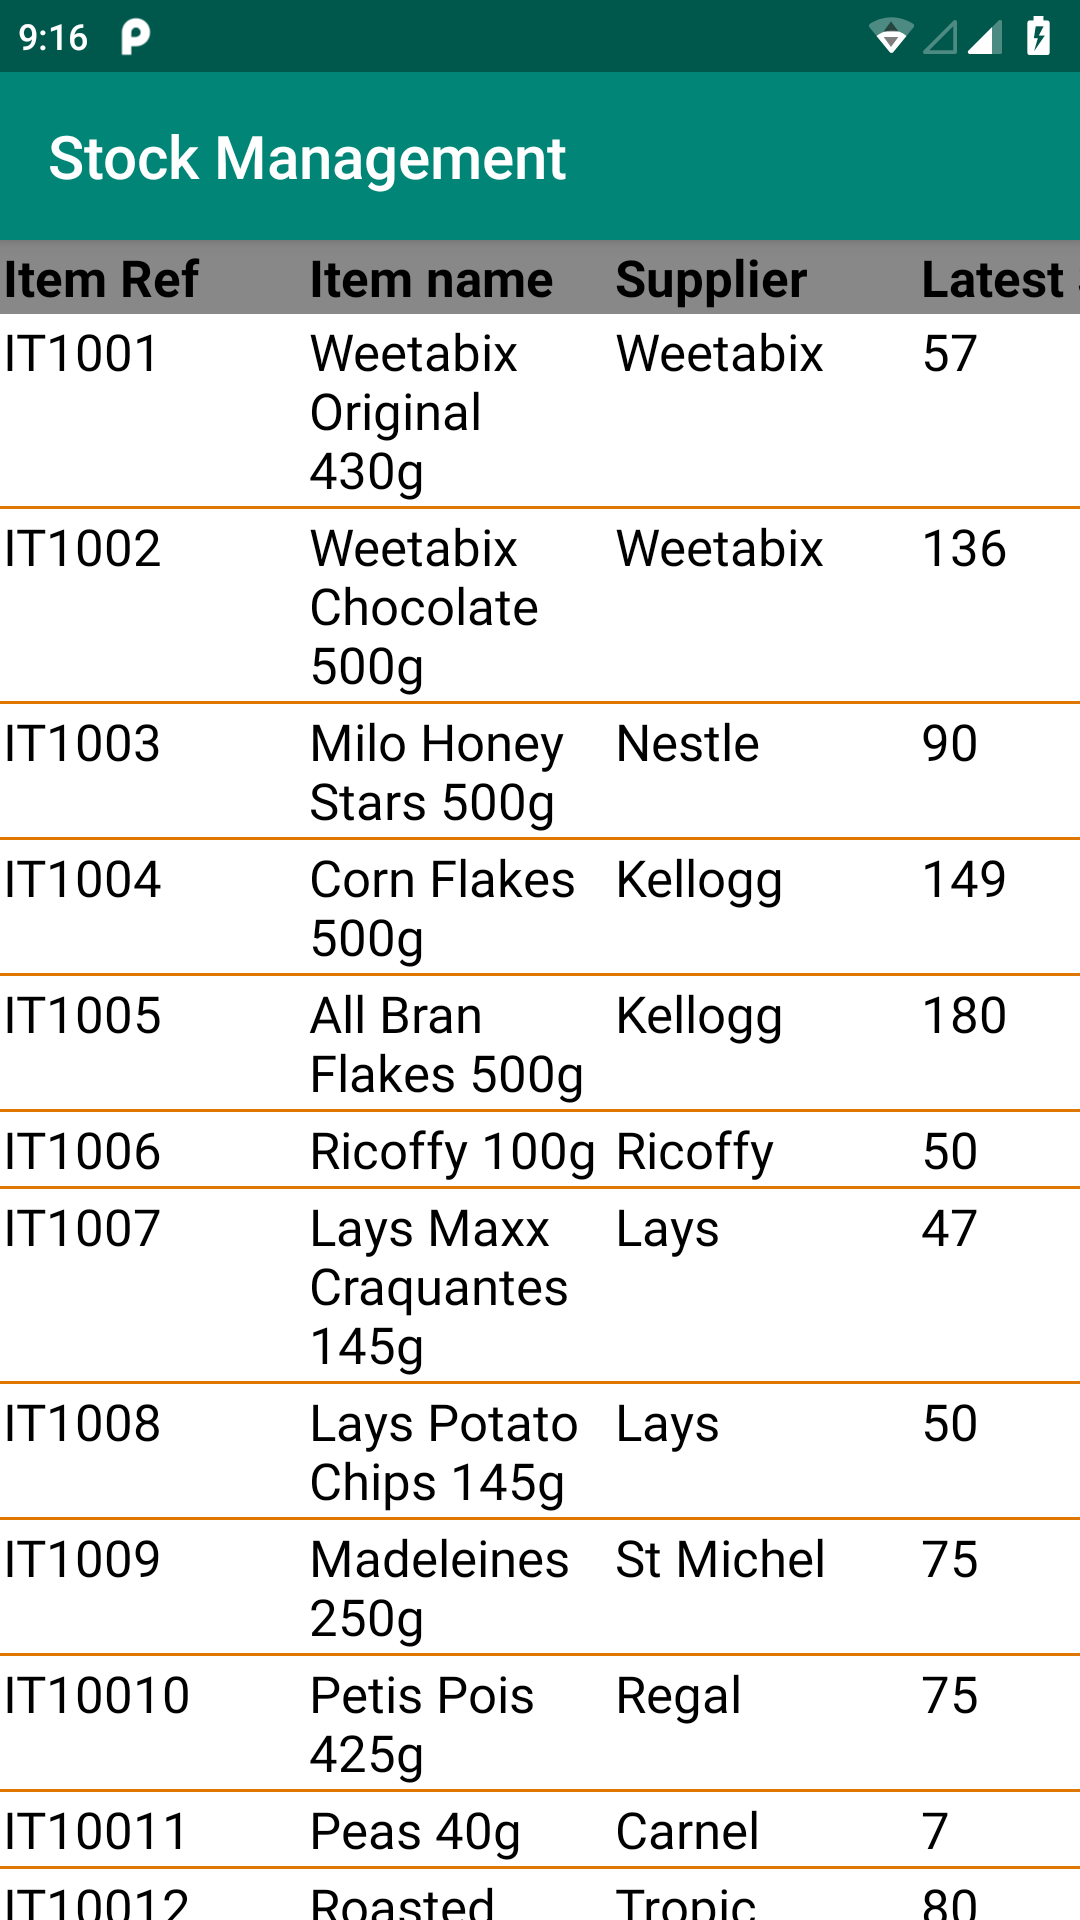
This is how the final Android Listview will look like:

Now we can move on to programming our Android ListView.
Create a new class file with name items.java and edit it as below. This file is just a work around file instead of making a whole SQLite database. This is my Data source for my ListView.
items.java:
package com.parallel.stockmanagement;

import java.util.ArrayList;
import java.util.List;

public class Items {

public String ItemRef;
public String Item;
public String Supplier;
public int LatestStock;
public int SalePrice;
public String BinNumber;
public int Balance;

public Items() {

}

public Items(String itemRef, String item, String supplier, int latestStock,
int salePrice, String binNumber, int balance) {
ItemRef = itemRef;
Item = item;
Supplier = supplier;
LatestStock = latestStock;
SalePrice = salePrice;
BinNumber = binNumber;
Balance = balance;
}

public List<Items> GetItems() {
List<Items> lstItems = new ArrayList<Items>();

lstItems.add(new Items("IT1001", "Weetabix Original 430g", "Weetabix",
57, 9, "B7", 50));

lstItems.add(new Items("IT1002", "Weetabix Chocolate 500g", "Weetabix",
136, 122, "B8", 120));

lstItems.add(new Items("IT1003", "Milo Honey Stars 500g", "Nestle",
90, 89, "B1", 80));

lstItems.add(new Items("IT1004", "Corn Flakes 500g", "Kellogg",
149, 99, "B7", 149));

lstItems.add(new Items("IT1005", "All Bran Flakes 500g", "Kellogg",
180, 199, "B2", 100));

lstItems.add(new Items("IT1006", "Ricoffy 100g", "Ricoffy",
50, 54, "B3", 50));

lstItems.add(new Items("IT1007", "Lays Maxx Craquantes 145g", "Lays",
47, 59, "B12", 47));

lstItems.add(new Items("IT1008", "Lays Potato Chips 145g", "Lays",
50, 74, "B12", 50));

lstItems.add(new Items("IT1009", "Madeleines 250g", "St Michel",
75, 79, "B2", 75));

lstItems.add(new Items("IT10010", "Petis Pois 425g", "Regal",
75, 18, "B13", 70));

lstItems.add(new Items("IT10011", "Peas 40g", "Carnel",
7, 18, "B1", 7));

lstItems.add(new Items("IT10012", "Roasted Peanuts 500g", "Tropic",
80, 62, "B5", 70));

lstItems.add(new Items("IT10013", "Tropical Mix 125g", "Tropic",
90, 53, "B6", 85));

lstItems.add(new Items("IT10014", "Sweet Kernel Corn 400g", "O&P",
72, 21, "B8", 70));

lstItems.add(new Items("IT10015", "Cadbury Fingers Dark & Milk 125g", "Cadbury",
65, 55, "B9", 60));

lstItems.add(new Items("IT10016", "Mushrooms Pieces & Sterns 400g", "Kalite",
60, 23, "B6", 59));

lstItems.add(new Items("IT10017", "Bisuits Caramel & Crunchie 130g", "Cadbury",
70, 68, "B10", 70));

lstItems.add(new Items("IT10018", "Barbecue Sauce 300ml", "Sunny",
60, 27, "B10", 40));

lstItems.add(new Items("IT10019", "Butter Doux 200g", "Lurpak",
50, 52, "B11", 50));

lstItems.add(new Items("IT10020", "Olive Grove 500g", "Olive",
190, 119, "B20", 150));

return lstItems;
}

}
Now edit your MainActivity.java file as below:
MainActivity.java:
package com.parallel.stockmanagement;

import android.os.Bundle;
import android.support.v7.app.AppCompatActivity;
import android.widget.ListView;
import android.widget.SimpleAdapter;
import android.widget.Toast;

import java.util.ArrayList;
import java.util.HashMap;
import java.util.List;
import java.util.Map;

public class MainActivity extends AppCompatActivity {

ListView lstStockItems;

@Override
protected void onCreate(Bundle savedInstanceState) {
super.onCreate(savedInstanceState);
setContentView(R.layout.activity_main);

lstStockItems = findViewById(R.id.lstStockItems);

FillList();

}

public void FillList() {
try {

Items items = new Items();
List<Map<String, String>> prolist = new ArrayList<Map<String, String>>();
String[] from = {"ItemRef", "Item", "Supplier", "LatestStock", "SalePrice", "BinNumber", "Balance"};
int[] views = {R.id.txtItemRef, R.id.txtItemName, R.id.txtSupplier,
R.id.txtLatestStock, R.id.txtSalePrice, R.id.txtBinNumber, R.id.txtBalance};

List<Items> lsr = items.GetItems();

for (int i = 0; i < lsr.size(); i++) {
Map<String, String> datanum = new HashMap<String, String>();
datanum.put("ItemRef", lsr.get(i).ItemRef);
datanum.put("Item", String.valueOf(lsr.get(i).Item));
datanum.put("Supplier", String.valueOf(lsr.get(i).Supplier));
datanum.put("LatestStock", String.valueOf(lsr.get(i).LatestStock));
datanum.put("SalePrice", String.valueOf(lsr.get(i).SalePrice));
datanum.put("BinNumber", String.valueOf(lsr.get(i).BinNumber));
datanum.put("Balance", String.valueOf(lsr.get(i).Balance));
prolist.add(datanum);
}

final SimpleAdapter simpleAdapter = new SimpleAdapter(MainActivity.this,
prolist, R.layout.lst_items, from,
views);
lstStockItems.setAdapter(simpleAdapter);
} catch (Exception ex) {
Toast.makeText(MainActivity.this, ex.getMessage().toString(),
Toast.LENGTH_LONG).show();
}
}
}
You can download source code of Android ListView Horizontal scroll from below.
Download Source Code.
Thank You. Happy Coding 🙂
Pingback: Download Source code No 105 - ParallelCodes
Hi ,
i want to ask, how to i have edit text and add to list view