Android Custom Launcher, Create Android Launcher,Create Android Custom Launcher
Hi Everyone, in this post we will see how we can create our own Android Custom Launcher in Android Studio.
Android Launchers are applications which replaces your default android skin launcher which your OEM provided with your Android phone. There are lots of Custom Launchers available on Google Play. Most famous is of course Nova Launcher. But let’s see how we can create our own Android Launcher in Android Studio.
Create a new project in Android Studio with your desired application name and Package name.
Application name : My Launcher
Package name : com.parallelcodes.mylauncher
In your res > layout folder create and edit following layout files.
1. activity_home.xml
2. activity_applist.xml
3. grd_items.xml
And Edit all these three layout files as below :
1. res > layout > activity_home.xml:
<?xml version="1.0" encoding="utf-8"?>
<RelativeLayout xmlns:android="http://schemas.android.com/apk/res/android"
    android:layout_width="match_parent"
    android:layout_height="match_parent"
    android:background="#000"
    android:orientation="vertical">

    <TextView
        android:id="@+id/txtTime"
        android:layout_width="match_parent"
        android:layout_height="wrap_content"
        android:layout_centerInParent="true"
        android:gravity="center_horizontal"
        android:text="My Launcher"
        android:textColor="#239ac5"
        android:textSize="30sp" />

    <TextView
        android:id="@+id/txtDate"
        android:layout_width="match_parent"
        android:layout_height="wrap_content"
        android:layout_below="@+id/txtTime"
        android:layout_centerInParent="true"
        android:gravity="center_horizontal"
        android:text="My Launcher"
        android:textColor="#239ac5"
        android:textSize="30sp" />


    <Button
        android:id="@+id/btnShowApps"
        android:layout_width="wrap_content"
        android:layout_height="wrap_content"
        android:layout_alignParentBottom="true"
        android:layout_centerHorizontal="true"
        android:background="@drawable/ic_drawer_small"
        android:onClick="showApps"
        android:textColor="#fff"
        android:textSize="30sp"
        android:textStyle="bold" />

</RelativeLayout>
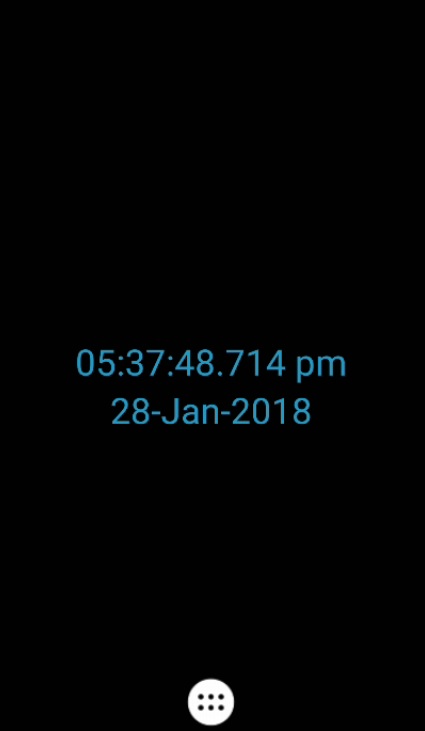
This layout will simply contain TextViews to display current Date and time, Android button for opening the app drawer.
2. res > layout > activity_applist.xml:
<?xml version="1.0" encoding="utf-8"?>
<LinearLayout xmlns:android="http://schemas.android.com/apk/res/android"
    android:layout_width="match_parent"
    android:layout_height="match_parent"
    android:background="#fff"
    android:orientation="vertical">


    <GridView
        android:id="@+id/grd_allApps"
        android:layout_width="match_parent"
        android:layout_height="match_parent"
        android:layout_margin="5dp"
        android:layout_weight="5"
        android:background="#000"
        android:horizontalSpacing="1dp"
        android:verticalSpacing="1dp"
        android:numColumns="4" />
</LinearLayout>
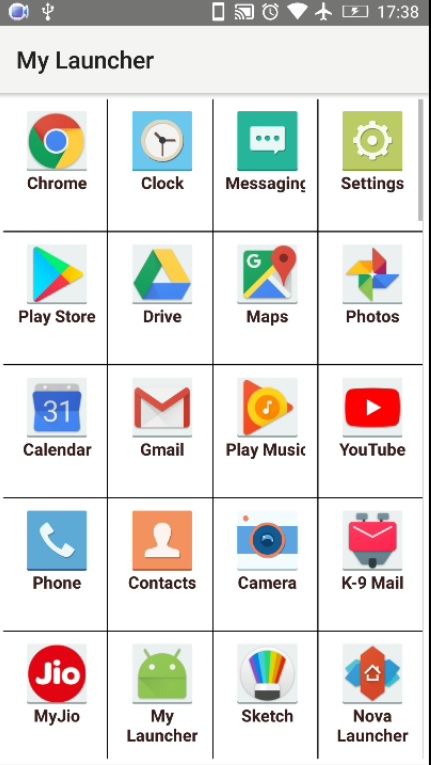
This will contain Android GridView to display all the application icon.
3. res > layout > grd_items.xml:
<?xml version="1.0" encoding="utf-8"?>
<LinearLayout xmlns:android="http://schemas.android.com/apk/res/android"
    android:layout_width="match_parent"
    android:layout_height="match_parent"
    android:background="#fff"
    android:orientation="vertical"
    android:padding="10dp">

    <ImageView
        android:id="@+id/img_icon"
        android:layout_width="70dp"
        android:layout_height="50dp"
        android:gravity="center_horizontal" />

    <TextView
        android:id="@+id/txt_label"
        android:layout_width="70dp"
        android:layout_height="40dp"
        android:gravity="center_horizontal"
        android:text="ADB Wireless by Henry"
        android:textColor="#361b1b"
        android:textStyle="bold" />

    <TextView
        android:id="@+id/txt_name"
        android:layout_width="0dp"
        android:layout_height="0dp"
        android:textColor="#fff"
        android:textSize="0sp"
        android:textStyle="bold" />
</LinearLayout>
Download the following icon drawer icon and save it in your res > drawable folder. It is just a png image.
Copy the icon file as below :
res > drawable > ic_drawer_small.png
Now create 3 class files (.java files) in your package with name :
1. AppInfo.java
2. GetApps.java
3. HomeActivity.java
and edit all of them as below :
AppInfo.java :
package com.parallelcodes.mylauncher;

import android.graphics.drawable.Drawable;

/**
 * Created by H on 1/28/2018.
 */
public class AppInfo {

    public CharSequence label;
    public CharSequence name;
    public Drawable icon;
}
HomeActivity.java:
package com.parallelcodes.mylauncher;

import android.app.Activity;
import android.content.Intent;
import android.os.Bundle;
import android.view.View;
import android.widget.TextView;

import java.text.SimpleDateFormat;
import java.util.Calendar;
import java.util.Timer;
import java.util.TimerTask;

public class HomeActivity extends Activity {
    TextView txtTime,txtDate;
    Calendar c;
    SimpleDateFormat simpleDateFormat;
    SimpleDateFormat simpleTimeFormat;
    @Override
    protected void onCreate(Bundle savedInstanceState) {
        super.onCreate(savedInstanceState);
        setContentView(R.layout.activity_home);
        simpleDateFormat = new SimpleDateFormat("dd-MMM-yyyy");
        simpleTimeFormat = new SimpleDateFormat("hh:mm:ss.SSS a");
        txtTime = (TextView) findViewById(R.id.txtTime);
        txtDate = (TextView) findViewById(R.id.txtDate);
        Timer timer = new Timer();

        timer.schedule(new TimerTask() {
            @Override
            public void run() {
                runOnUiThread(new Runnable() {

                    @Override
                    public void run() {
                        c = Calendar.getInstance();
                        txtDate.setText(simpleDateFormat.format(c.getTime()));
                        txtTime.setText(simpleTimeFormat.format(c.getTime()));
                    }

                });

            }
        }, 0, 10);
    }

    public void showApps(View v) {
        Intent i = new Intent(HomeActivity.this, GetApps.class);
        startActivity(i);
    }


}
This will be Home page of our Android Launcher. This will display current Time using the calendar Instance and convert it into custom format using SimpleDateFormat.
GetApps.java:
package com.parallelcodes.mylauncher;

import android.app.Activity;
import android.content.Intent;
import android.content.pm.PackageManager;
import android.content.pm.ResolveInfo;
import android.os.Bundle;
import android.util.Log;
import android.view.View;
import android.view.ViewGroup;
import android.widget.AdapterView;
import android.widget.ArrayAdapter;
import android.widget.GridView;
import android.widget.ImageView;
import android.widget.TextView;
import android.widget.Toast;

import java.util.ArrayList;
import java.util.List;

/**
 * Created by H on 1/28/2018.
 */
public class GetApps extends Activity {

    PackageManager packageManager;
    public static List<AppInfo> apps;
    GridView grdView;
    public static ArrayAdapter<AppInfo> adapter;

    @Override
    public void onCreate(Bundle savedInstanceState) {
        super.onCreate(savedInstanceState);

        setContentView(R.layout.activity_applist);

        apps = null;
        adapter = null;
        loadApps();
        loadListView();
        addGridListeners();
    }

    public void addGridListeners() {
        try {
            grdView.setOnItemClickListener(new AdapterView.OnItemClickListener() {
                @Override
                public void onItemClick(AdapterView<?> adapterView, View view, int i, long l) {
                    Intent intent = packageManager.getLaunchIntentForPackage(apps.get(i).name.toString());
                    GetApps.this.startActivity(intent);
                }
            });
        } catch (Exception ex) {
            Toast.makeText(GetApps.this, ex.getMessage().toString() + " Grid", Toast.LENGTH_LONG).show();
            Log.e("Error Grid", ex.getMessage().toString() + " Grid");
        }

    }


    private void loadListView() {

        try {
            grdView = (GridView) findViewById(R.id.grd_allApps);
            if (adapter == null) {
                adapter = new ArrayAdapter<AppInfo>(this, R.layout.grd_items, apps) {

                    @Override
                    public View getView(int position, View convertView, ViewGroup parent) {

                        ViewHolderItem viewHolder = null;

                        if (convertView == null) {
                            convertView = getLayoutInflater().inflate(
                                    R.layout.grd_items, parent, false
                            );
                            viewHolder = new ViewHolderItem();
                            viewHolder.icon = (ImageView) convertView.findViewById(R.id.img_icon);
                            viewHolder.name = (TextView) convertView.findViewById(R.id.txt_name);
                            viewHolder.label = (TextView) convertView.findViewById(R.id.txt_label);

                            convertView.setTag(viewHolder);
                        } else {
                            viewHolder = (ViewHolderItem) convertView.getTag();
                        }

                        AppInfo appInfo = apps.get(position);

                        if (appInfo != null) {
                            viewHolder.icon.setImageDrawable(appInfo.icon);
                            viewHolder.label.setText(appInfo.label);
                            viewHolder.name.setText(appInfo.name);
                        }
                        return convertView;

                    }

                    final class ViewHolderItem {
                        ImageView icon;
                        TextView label;
                        TextView name;
                    }
                };
            }

            grdView.setAdapter(adapter);
        } catch (Exception ex) {
            Toast.makeText(GetApps.this, ex.getMessage().toString() + " loadListView", Toast.LENGTH_LONG).show();
            Log.e("Error loadListView", ex.getMessage().toString() + " loadListView");
        }

    }

    private void loadApps() {
        try {

            packageManager = getPackageManager();
            if (apps == null) {
                apps = new ArrayList<AppInfo>();

                Intent i = new Intent(Intent.ACTION_MAIN, null);
                i.addCategory(Intent.CATEGORY_LAUNCHER);

                List<ResolveInfo> availableApps = packageManager.queryIntentActivities(i, 0);
                for (ResolveInfo ri : availableApps) {
                    AppInfo appinfo = new AppInfo();
                    appinfo.label = ri.loadLabel(packageManager);
                    appinfo.name = ri.activityInfo.packageName;
                    appinfo.icon = ri.activityInfo.loadIcon(packageManager);
                    apps.add(appinfo);

                }
            }

        } catch (Exception ex) {
            Toast.makeText(GetApps.this, ex.getMessage().toString() + " loadApps", Toast.LENGTH_LONG).show();
            Log.e("Error loadApps", ex.getMessage().toString() + " loadApps");
        }

    }
}
This will be our Application drawer activity of Android Launcher. Application will be displayed in a Grid format (Android GridView) of 4 columns. On pressing the button from our first activity, this will display all the application which are present in a Android Gridview format. That’s all. Happy Coding!
Hello sir, can we show background image where the time is displayed.
Hi Goutham. Yes you can have Imageview instead of Textview “txtTime”. Replace it with an ImageView….but to make it work it as a Wallpaper, you will need to create a functionality of picking up an image from gallery and showing it on Imageview.
Pingback: 由于Kotlin中未解决的引用,因此无法设置文本或可绘制 – FIXBBS
How to sort the apps alphabetically according to the app label?
Pingback: Can't set text or drawable because of unresolved references in Kotlin - Tutorial Guruji
sir on which software did you code it